Controlling LIFX lights with your (Laravel or other) web applications

This is a series of posts on IoT for Developers.
!Warning: This post is over a year old. I don't always update old posts with new information, so some of this information may be out of date.
(Already familiar with IoT and LIFX? Skip straight to the tutorial; TL;DR is that you can, with a few lines of code, directly control lights in your house or office right from your applications)
A brief introduction: "Why IoT?"
For a long time, IoT (Internet of Things) has been something that hasn't interested me at all.
For starters, I always thought of it as "controlling your house with Alexa", and my family has a "no always-on microphones" rule in the house, so no Echo, no Google Home, no nothing. (Yes, we have smartphones, but we even work—and are trying to work even more—to limit their ubiquity in the house). It was only recently that I realized there are many other ways to control smart devices other than just voice-activation.
But more importantly, I just didn't get the appeal. Why is this actually valuable in my life?
It took visiting my dad for Thanksgiving and seeing that he received practical value from his IoT devices—for example, turning on the exterior lights of his house when he drives up actually makes it easier to navigate the driveway, or pressing a single button at bed time to trigger a series of events saves him from manually walking around the house every night flipping switches.
As a programmer, of course, I instantly saw how I could use IoT devices to allow my applications to interact with the real world. I'm totally fascinated by this idea; I've long wanted a button I could press that would make things happen on the Internet. (Yes, I own several Amazon Dash buttons, but they are pretty steep learning curve and not particularly easy to get). I just hadn't made the connection between this dream and the new "IoT" fad.
So, at a friend's recommendation, I got my first IoT devices: LIFX lights.
Why LIFX?
There are many different smart lighting companies. Sylvania, Phillips Hue, LIFX; the list goes on and on.
Hue requires you to have a Hue hub, so it's hard to just get started with. Sylvania has a hub, but also can connect directly to SmartThings (a more centralized, shared system for IoT); great bulbs, but not good for one-offs like this.
With LIFX, each bulb functions independently; that means you can just buy one and only one, and also each individual bulb can work with multiple systems like SmartThings and Apple's HomeKit. The bulbs are pricier as a result, so if you're going to do your whole house with them, I'd consider a SmartThings hub and some Sylvania bulbs. But if you just want to test the waters, LIFX is a solid place to start. (If price is a big concern, I hope to write up a similar article soon about the currently-$30 ThingM blink(1))
Another win for LIFX: There's a direct IFTTT integration to your LIFX account. This is the easiest possible connection between an app and an IoT device you can possibly make.
If you're just getting started, your cheapest multi-color option is the currently-$45 "LIFX Mini Color". I bought mine all during their incredibly discounted holiday season, so if all else fails you can wait until Black Friday to snatch some up.
Let's start simple and look at how to control a LIFX light from your Laravel application.
The actual tutorial
Let's do this. We're going to enable your web application, with just a few lines of code, to control your LIFX lights, right in front of you, right now.
Intro to IFTTT
If you're an IFTTT pro, skip to the next section.
IFTTT is a web-based system that lets you plug triggers ("this") to actions ("that"). Some of the most common examples are: If "I add a new photo to my Instagram" (this) then "save that photo to my Dropbox 'photos' folder" (that).
Each "Applet", which is a description of a "this" and a "that", runs independently from the others. And each "this" and "that" is connected to a "service", which you have to authenticate into your IFTTT account. Facebook; Alexa; Tumblr; Pinboard; Google Drive; Dropbox; etc.
Connecting your LIFX bulbs to a webhook in IFTTT
Let's get it going. First, visit https://ifttt.com/lifx and authorize your IFTTT account with your LIFX account.
Next, create a new IFTTT Applet and begin to set up your "this" trigger with the type "Webhooks". IFTTT calls this the "Maker webhooks" type, and you'll have to also give it permission to hook into your IFTTT account.
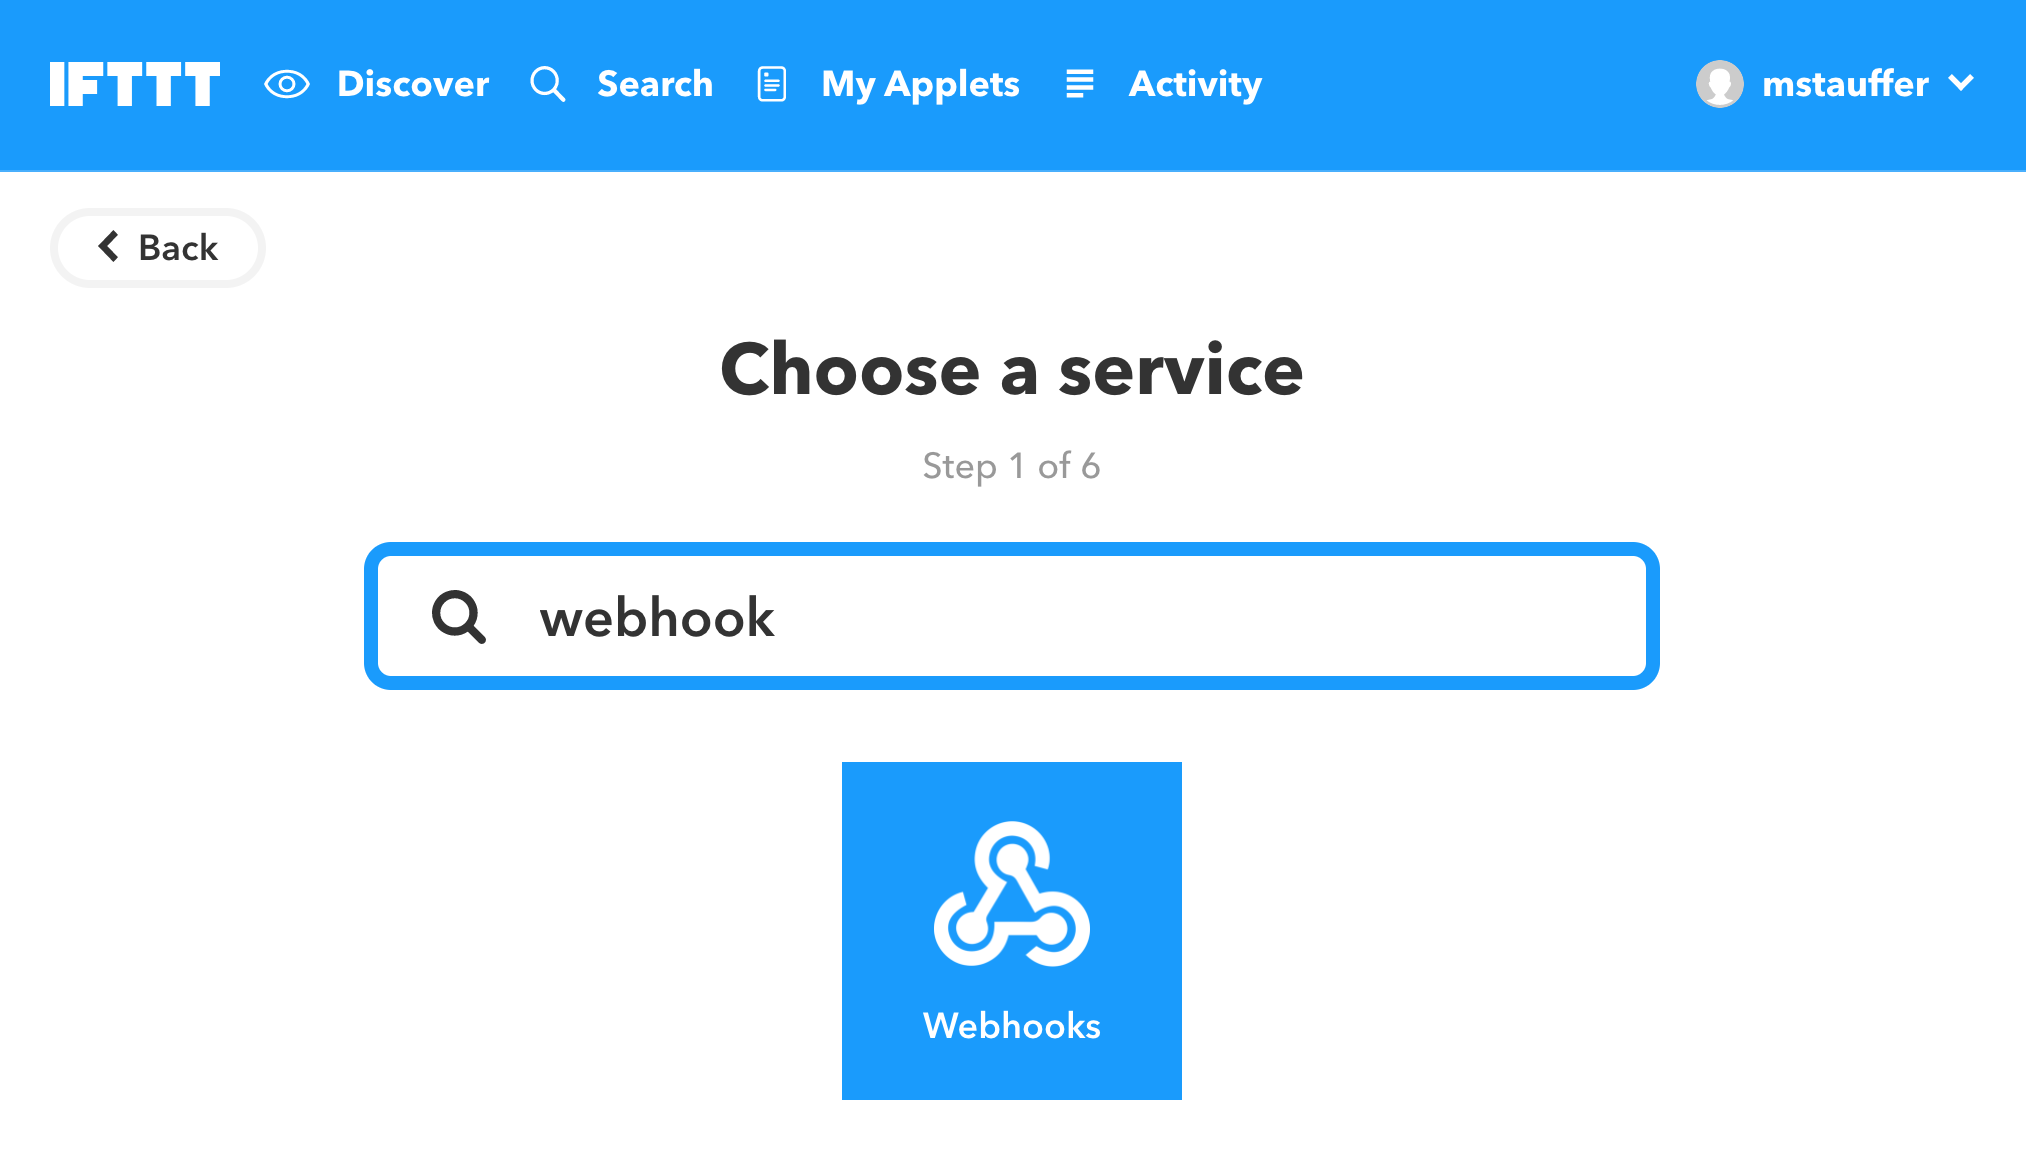
You'll want to go into the Maker webhooks landing page and visit the documentation page from there, where you'll get a sample webhook URL you can ping from your app. You only get one URL, but you can change its {event} segment per intended use.
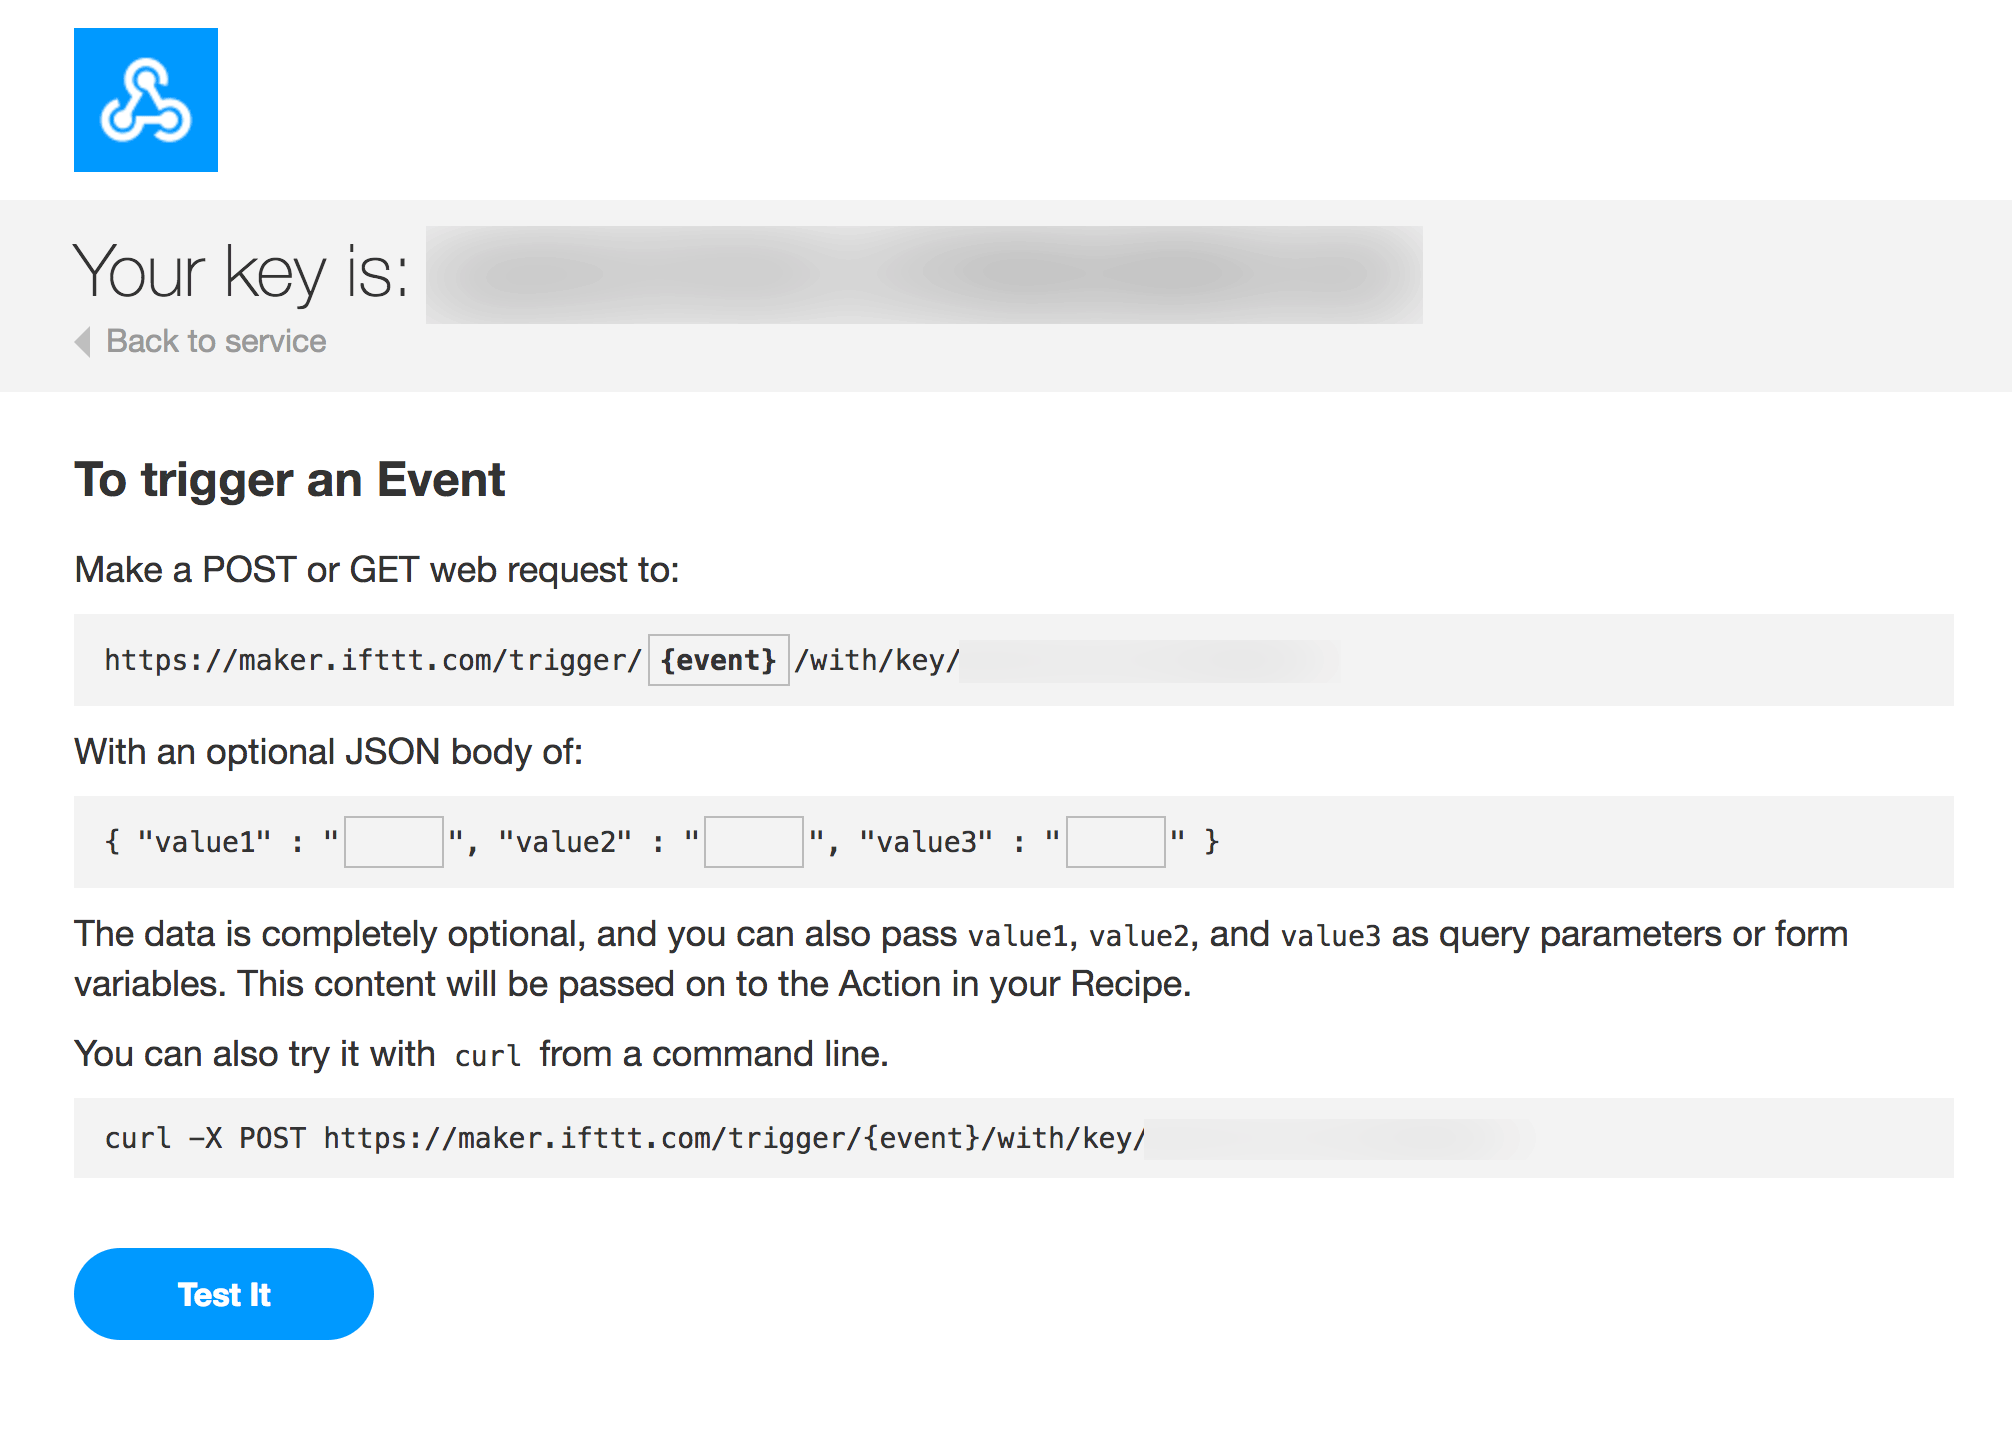
The sample URL you get should look something like this:
https://maker.ifttt.com/trigger/{eventName}/with/key/{yourKey}
For this example, we're going to be triggering the "new_episode" event, which I'll trigger from my app every time there's a new episode of my podcast.
Finish creating the Applet
Let's go back to that new Applet you were creating. Now that you have Maker webhooks enabled, you can set it so your "this" is "Receive a web request with Event Name of 'new_episode'". Done. It's now just listening for this URL:
https://maker.ifttt.com/trigger/new_episode/with/key/{yourKey}
Now, let's set the "that". Pick LIFX, and authorize your LIFX account with your IFTTT account.
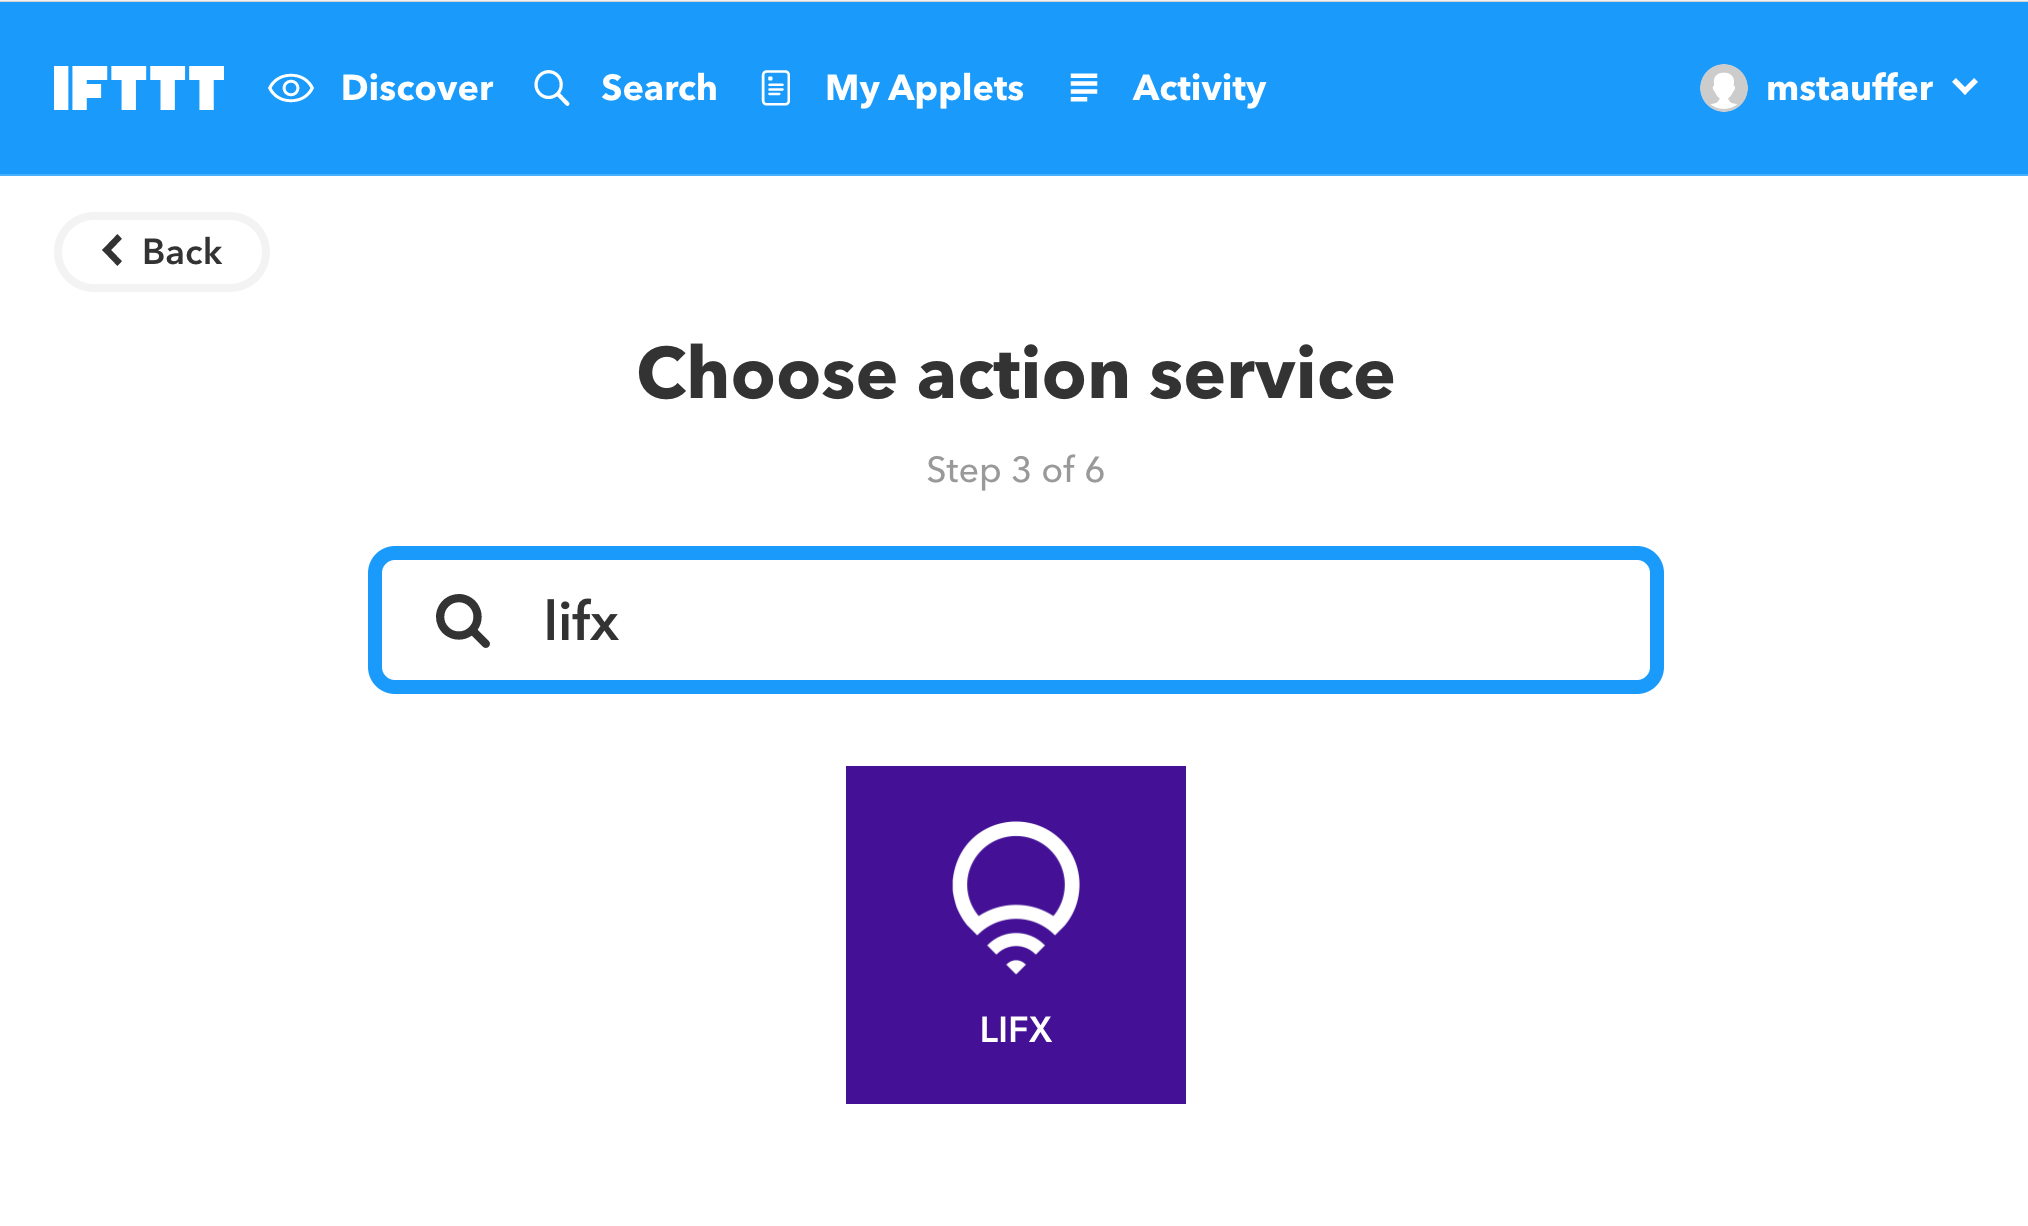
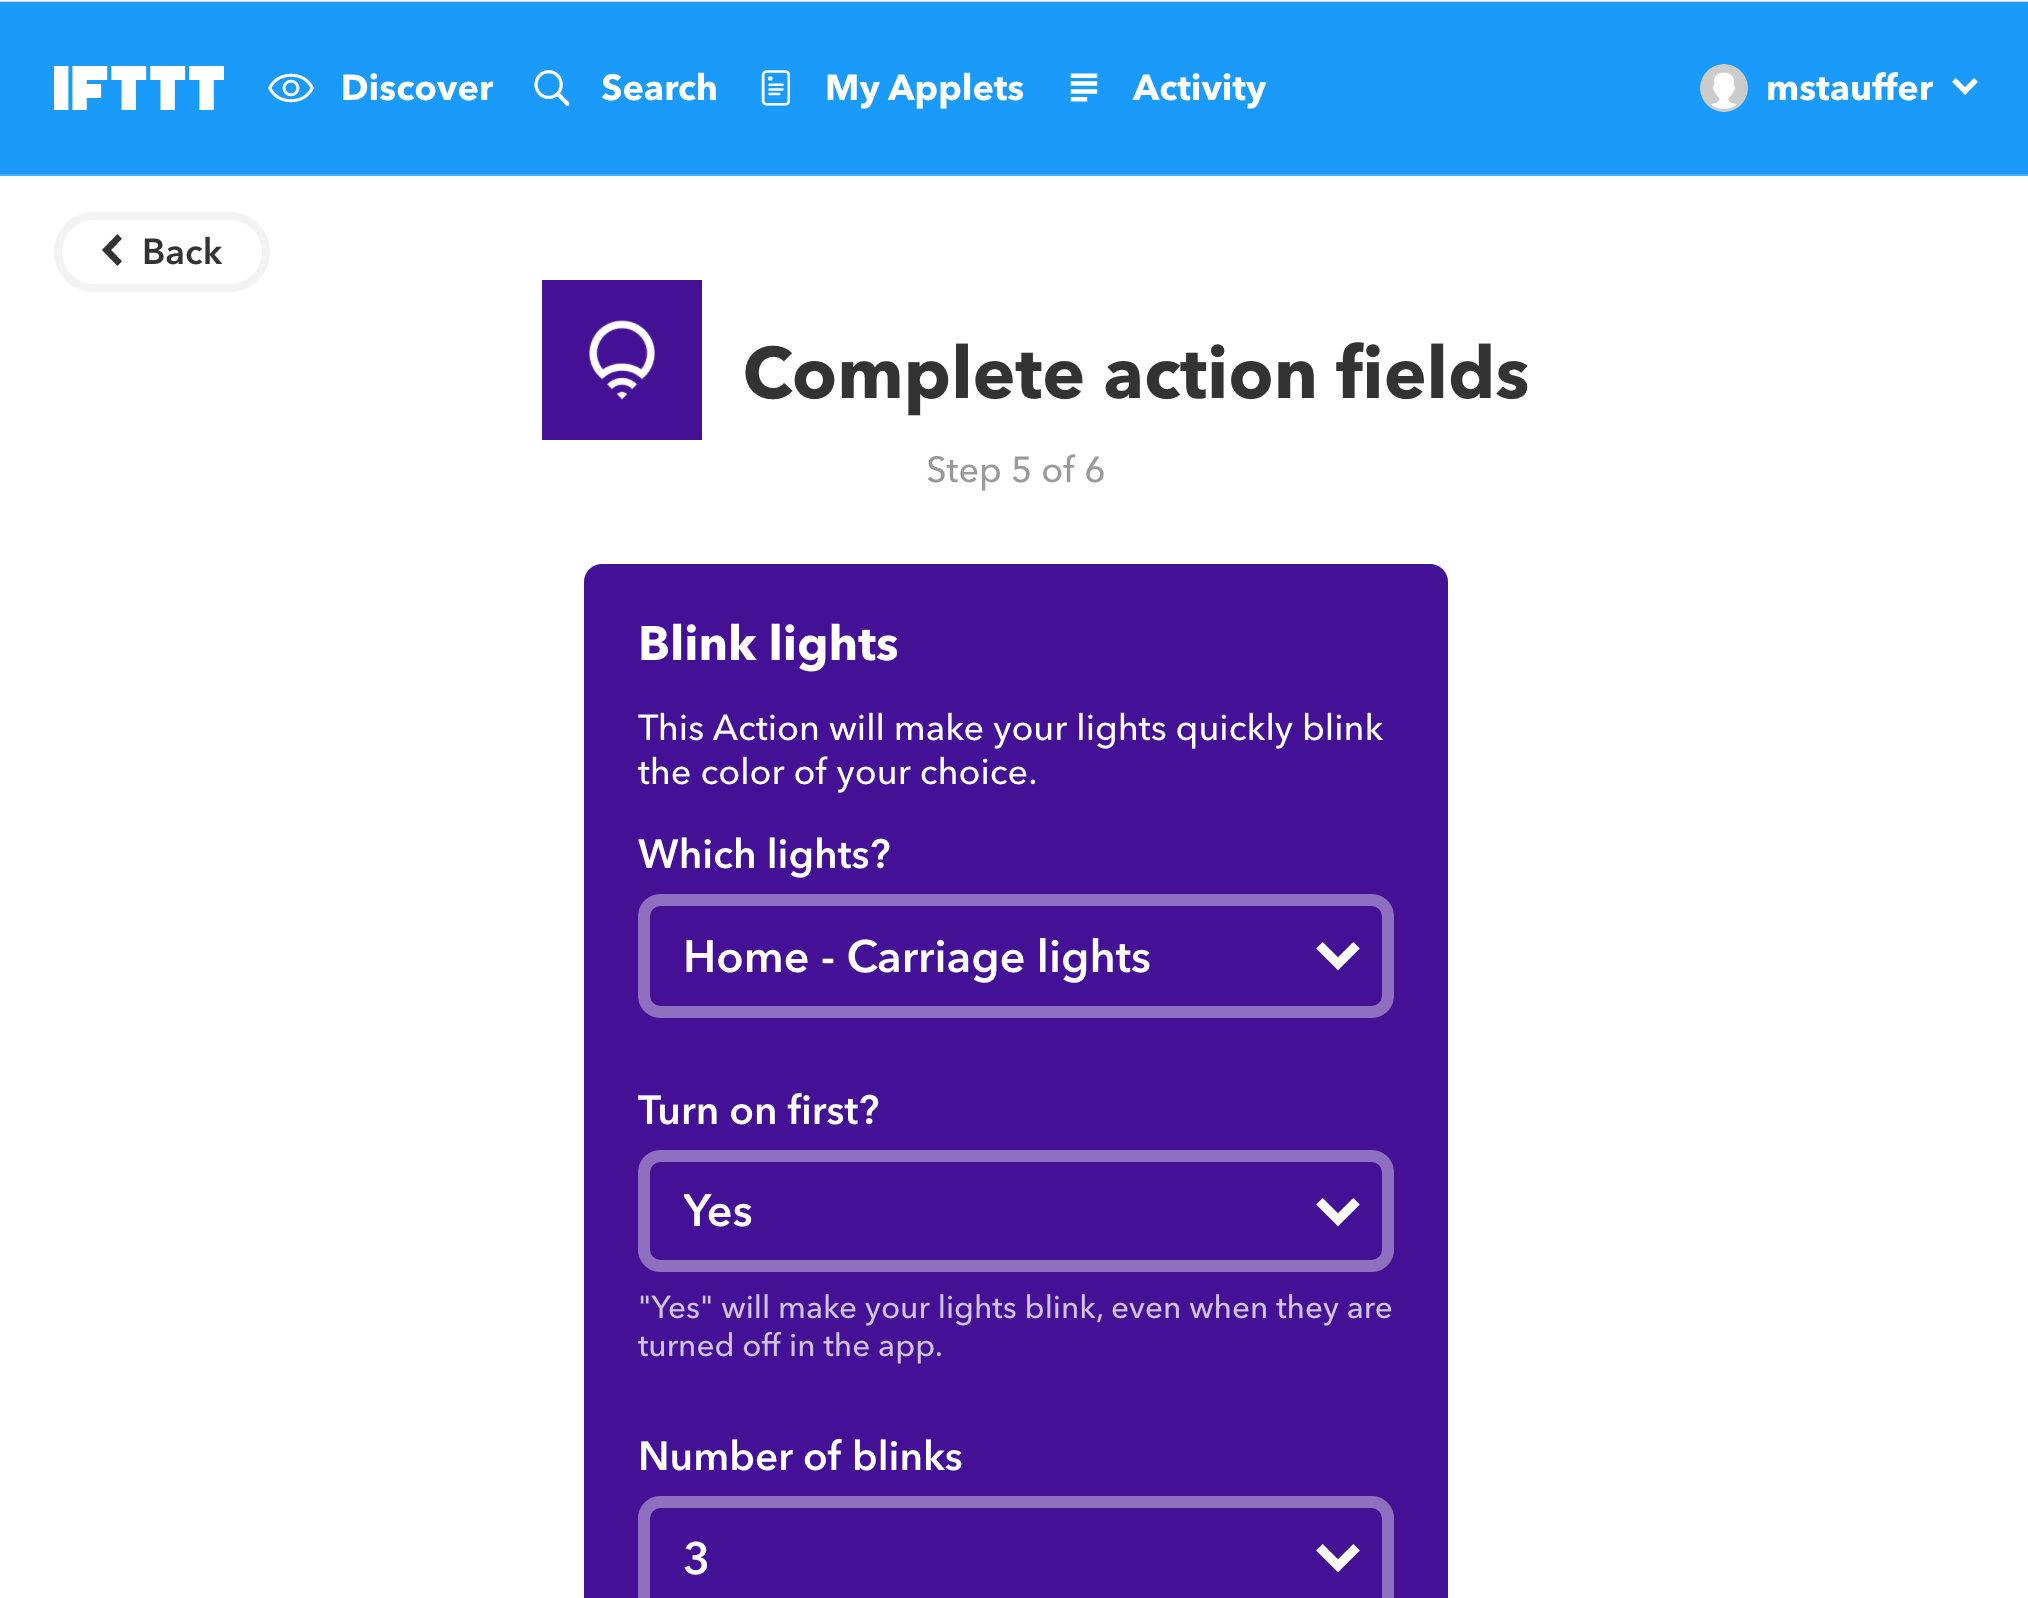
There are a few actions you can choose to take with your LIFX lights, and you can dig into all of them. I picked "Blink lights", and I set the lights on the front of my house to blink blue 3 times at a bright setting. Why not.
Testing your webhook
Want to test it to make sure it works? Just ping it with Curl on your command line. Remember, {yourKey} can be gotten by visiting the "Maker webhooks" service section of IFTTT and visiting "Documentation".
Run this command:
curl -X POST https://maker.ifttt.com/trigger/new_episode/with/key/{yourKey}
and you should, after a second or three, see your lights blink. Almost done!
Pinging a webhook from your Laravel/PHP apps
Finally, you just have to ping a webhook from your Laravel (or other PHP) app.
There are three main ways to send a POST HTTP request in PHP: Curl, file_get_contents, or Guzzle. There are a million examples if you just google "PHP send POST", so I'll just give you quick examples for Guzzle (if you already have it on your project, which you will if it's Laravel) or file_get_contents if you don't.
Pinging a webhook with Guzzle
Let's assume you're using Laravel. You'll want to move your key out of your code in case you ever share it with anyone else, which you can do by adding a section to the config/services.php file:
    // config/services.php
    // ...
    'ifttt' => [
        'webhook_key' => env('IFTTT_WEBHOOK_KEY'),
    ],
And then add that environment variable to .env (with the real key) and .env.example (with an empty key, as an example):
# In .env
IFTTT_WEBHOOK_KEY=myKeyFromTheIftttDocumentationPage

# In .env.example
IFTTT_WEBHOOK_KEY=
Finally, you can make the call:
$eventName = 'new_episode';

(new \GuzzleHttp\Client)->post(
    'https://maker.ifttt.com/trigger/' . $eventName . '/with/key/' . config('services.ifttt.webhook_key')
);
Boom. Up and running. Throw that bad boy into a cron job, an event listener, a controller method, or whatever else, and any action or trigger in your app can now make changes to your LIFX lights.
Pinging a webhook with file_get_contents
Don't have Guzzle? You can use Curl or file_get_contents; just because Curl is a dependency that MAYYY not be around on some servers, I'll show you file_get_contents.
file_get_contents(
    'https://maker.ifttt.com/trigger/{eventName}/with/key/{key}',
    false,
    stream_context_create([
        'http' => [
            'header' => "Content-type: application/x-www-form-urlencoded\r\n",
            'method' => 'POST',
        ]
    ])
);
Pinging a webhook with JavaScript?
IFTTT doesn't have their CORS set up to allow webhook pings from JavaScript—probably wisely—so you can't do this from frontend JavaScript.
Special extra trick: passing parameters
What if you want to pass the color, for example, along with the webhook? Just pass it as a parameter:
(new \GuzzleHttp\Client)->post(
    'https://maker.ifttt.com/trigger/{eventName}/with/key/{key}',
    [
        'form_params' => ['value1' => 'red'],
    ]
);

// or...

file_get_contents(
    'https://maker.ifttt.com/trigger/{eventName}/with/key/{key}',
    false,
    stream_context_create([
        'http' => [
            'header' => "Content-type: application/x-www-form-urlencoded\r\n",
            'method' => 'POST',
            'content' => http_build_query(['value1' => 'red'])
        ]
    ])
);
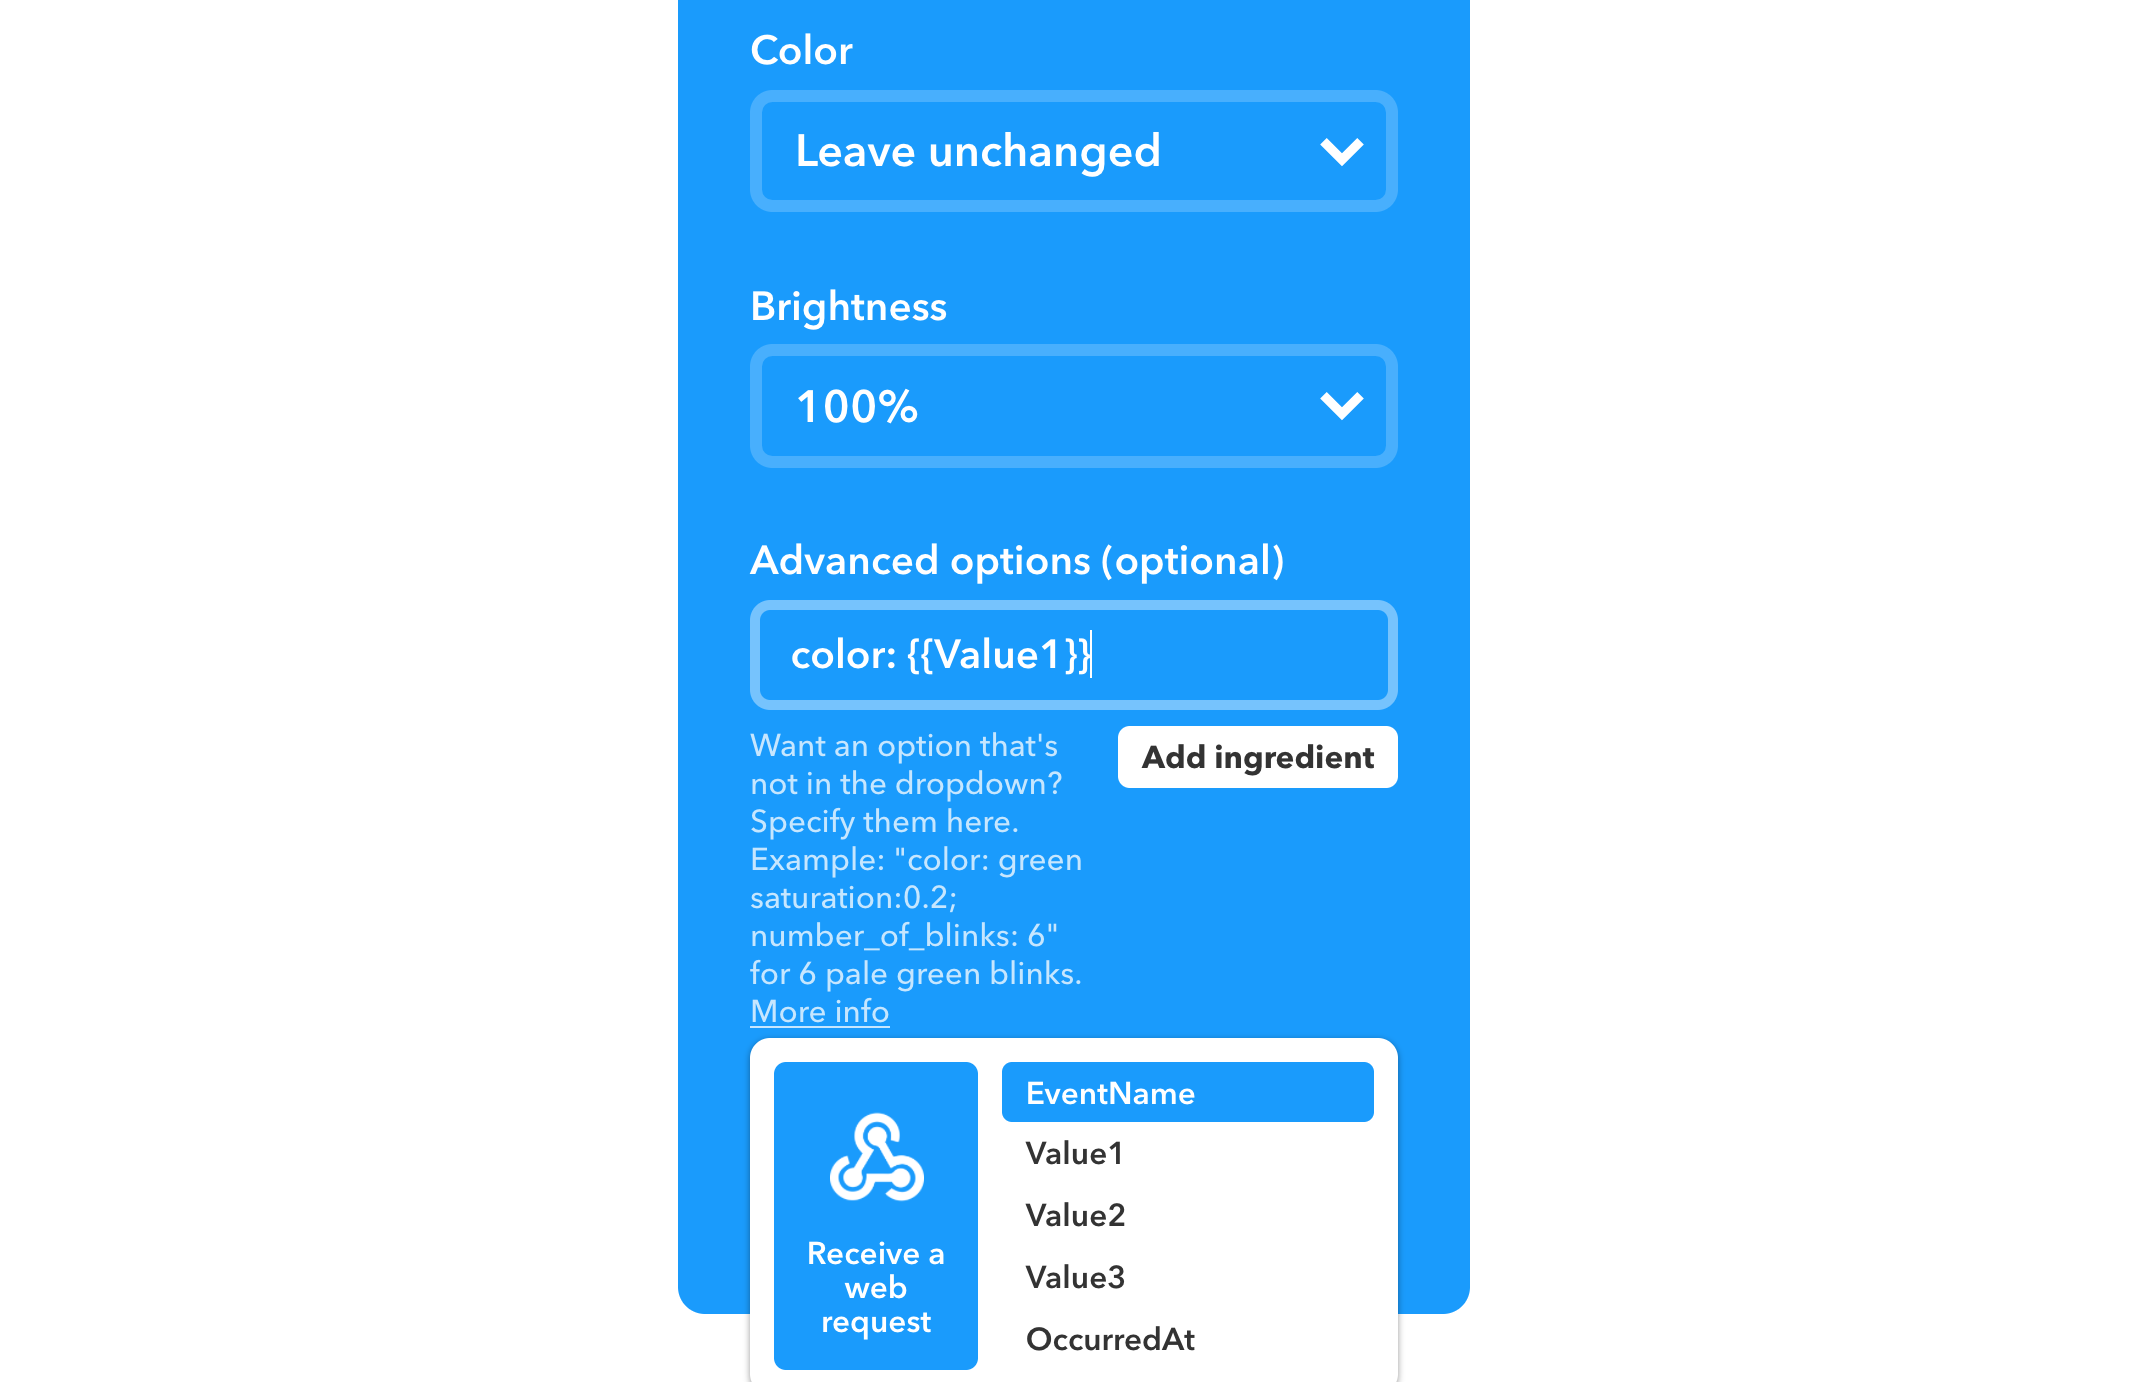
For some reason, it only gives you a limited option of possible keys you can pass: value1, value2, or value3. I'm not sure why, but this may be a built-in restriction of the "Maker webhook" type; please let me know on Twitter if you know.
Then pull it in the IFTTT custom settings; as you can see here, I'm setting "color" (a LIFX property, which I discovered by looking at the explainer text under Advanced Options) to be equal to the value of the "value1" form input. (For some reason, IFTTT capitalizes Value1, but it still works the same.)
Outro
This is just one little thing done. One little bit of LIFX, a bit of IFTTT (I'm sure you've realized that you can use this to trigger all sorts of different events with your apps and IFTTT), and only a single-direction call (app -> real world device).
Next time we'll talk about receiving input from an IoT device on your apps. Stay tuned, dear listeners (readers)!


Comments? I'm @mattstauffer on Twitter
Tags: laravel • iot • lifx
This is part of a series of posts on IoT for Developers:
-
Jan 21, 2018 | laravel, iot, lifx