Introducing Laravel Spark: A Deep Dive
!Warning: This post is over a year old. I don't always update old posts with new information, so some of this information may be out of date.
If you've been around on the general Laravel-interested Internet over the last month or two, or if you attended Laracon US or Laracon EU, you've probably already heard of Laravel Spark. If you haven't, check out Taylor's introductory video from Laracon EU.
I've held off on writing about it until now, because it has changed a lot over the span of its development. It's released as an Alpha now, so the API has solidified some... but it'll still change quite a bit between now and the release.
WARNING: This article is about an alpha release. This release is not intended to show the final API or feature set. Spark will change often before its release, and I won't always catch every change immediately. If you find any ways this guide has become out-of-date as Spark changes between Alpha and final release, please let me know here. If you hate something and think it's the worst idea you've ever seen, chill. This is just an alpha and there's no promise anything will stay the way it is right now.
If you want a quick, TL;DR version of how to install Spark, check out Laravel News' quick writeup. This is, instead, a deep-dive into how it works and what it does. I'll be writing a more general introduction to Spark once it's actually released, so beware: this is a bit of a deeper dive, for people geeky enough to want to look at an alpha release.
High-level overview
In case you're still having a bit of trouble understanding what Spark is really about, Spark is a tool designed to make it quicker for you to spin up SaaS applications, and it handles user authentications, plans and payments and coupons, and team logic.
Most SaaSes have these same components: user accounts, Stripe-based payments, and different payment plans. And many have payment coupons and team payment options.
Rather than re-creating this functionality with every new Laravel app you create, just use Spark, and you'll get all that and a free SaaS landing page to boot.
Installing Spark
Like Laravel and Lumen, Spark has a global Composer installer to make installation simpler. To install the Spark installer, run this command:
composer global require "laravel/spark-installer=~1.0"
Note: Like with the other installers, you need to make sure that the global Composer
binis in your system's$PATHso that when you runsparkfrom the command line, it'll findsparkfrom within that folder.
Adding Spark to your new Laravel install
So, let's create a new Laravel application:
cd ~/Sites
laravel new spark-blog-post
cd spark-blog-post
The next step is to install Spark.
And then we install Spark:
spark install
That's it for installation. It'll give you several prompts; you'll probably just want to choose yes for everything.
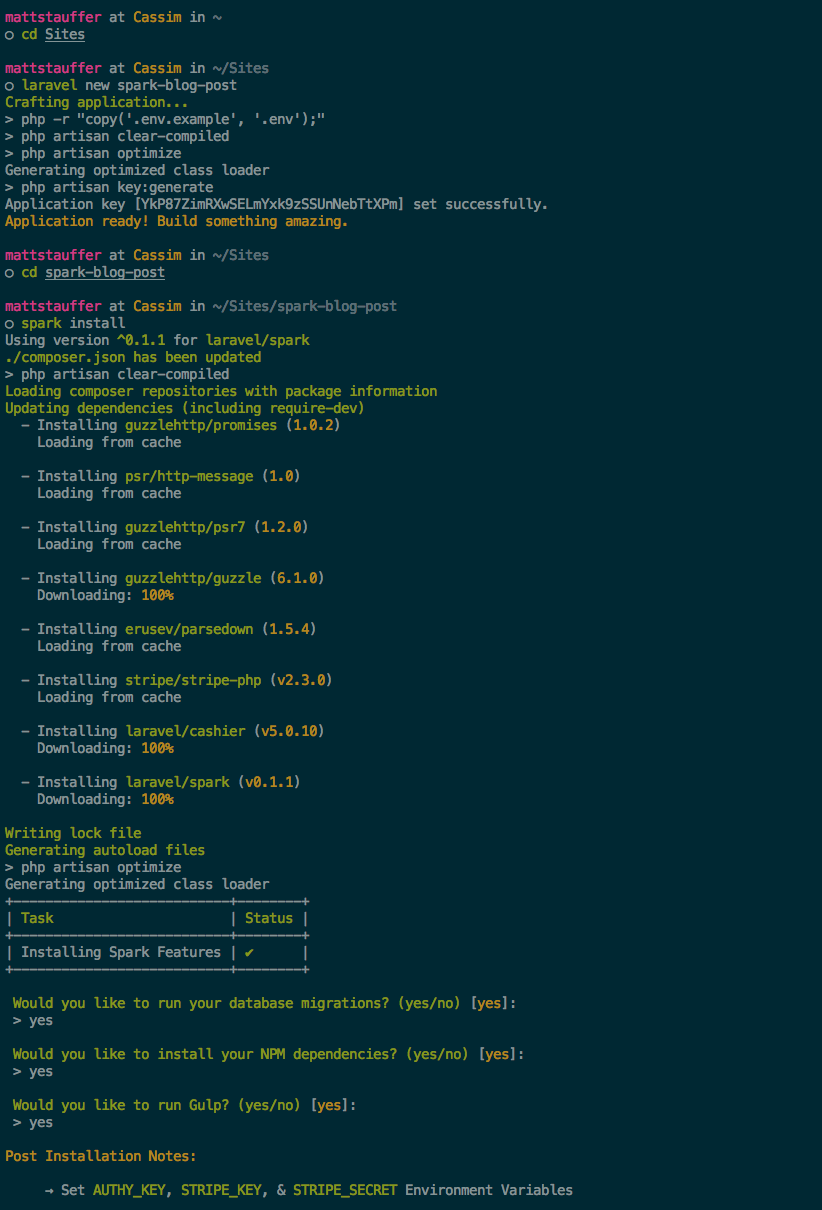
Finally, like it told you to, go into your .env and add your Stripe Key & Secret, and, optionally, your Authy key.
Migrations
If you, like me, develop on Homestead, the "migrations" step likely just did nothing. And if you hadn't edited your .env before you ran spark install, which I didn't tell you to, then it REALLY didn't do anything. But that's fine.
The best way to do it, if you're setting up this site on Homestead, is: now that you've installed Spark, go edit your .env file to customize the database name that you'd like to use for this site. Then ssh into your Homestead box and migrate the database from there. Done.
Changes Spark makes to your files
Spark has done quite a bit here. Check it out:
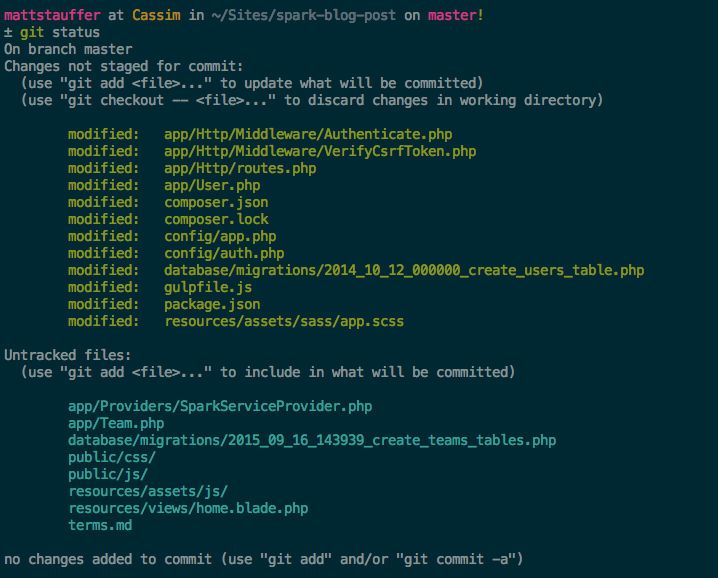
This is changing some default views (e.g. changing the root from showing welcome to showing spark::welcome) and adding others (/home, wrapped in the auth middleware). It's also updating the User model to make it Billable and TwoFactorAuthenticatable. It's adding quite a few Stripe-related fields to the User that you'll be familiar with if you've ever used Laravel Cashier (and if you hadn't guessed, Cashier is a dependency of Spark).
It's adding CashierServiceProvider and two SparkServiceProviders. It's updating the password reset email to be the Spark password reset email. It's updating the create tables migration to add Cashier, Team, and Two-Factor Auth columns.
Finally, it's pulling in app.js into Elixir and adding some Spark-specific Sass variables to app.scss.
New files from Spark
Spark also added quite a few files for you. Let's look through them.
app/Providers/SparkServiceProvider.php
The SparkServiceProvider is where you do most of the customization, so it's accordingly huge.
<?php

namespace App\Providers;

use App\Team;
use Validator;
use Laravel\Spark\Spark;
use Illuminate\Http\Request;
use Laravel\Spark\Providers\AppServiceProvider as ServiceProvider;

class SparkServiceProvider extends ServiceProvider
{
    /**
     * Meta-data included in invoices generated by Spark.
     *
     * @var array
     */
    protected $invoiceWith = [
        'vendor' => 'Your Company',
        'product' => 'Your Product',
        'street' => 'PO Box 111',
        'location' => 'Your Town, 12345',
        'phone' => '555-555-5555',
    ];

    /**
     * Bootstrap any application services.
     *
     * @return void
     */
    public function boot()
    {
        parent::boot();

        //
    }

    /**
     * Customize general Spark options.
     *
     * @return void
     */
    protected function customizeSpark()
    {
        Spark::configure([
            'models' => [
                'teams' => Team::class,
            ]
        ]);
    }

    /**
     * Customize Spark's new user registration logic.
     *
     * @return void
     */
    protected function customizeRegistration()
    {
        // Spark::validateRegistrationsWith(function (Request $request) {
        //     return [
        //         'name' => 'required|max:255',
        //         'email' => 'required|email|unique:users',
        //         'password' => 'required|confirmed|min:6',
        //         'terms' => 'required|accepted',
        //     ];
        // });

        // Spark::createUsersWith(function (Request $request) {
        //     // Return New User Instance...
        // });
    }

    /**
     * Customize the roles that may be assigned to team members.
     *
     * @return void
     */
    protected function customizeRoles()
    {
        Spark::defaultRole('member');

        Spark::roles([
            'admin' => 'Administrator',
            'member' => 'Member',
        ]);
    }

    /**
     * Customize the tabs on the settings screen.
     *
     * @return void
     */
    protected function customizeSettingsTabs()
    {
        Spark::settingsTabs()->configure(function ($tabs) {
            return [
                $tabs->profile(),
                $tabs->teams(),
                $tabs->security(),
                $tabs->subscription(),
                // $tabs->make('Name', 'view', 'fa-icon'),
            ];
        });

        Spark::teamSettingsTabs()->configure(function ($tabs) {
            return [
                $tabs->owner(),
                $tabs->membership(),
                // $tabs->make('Name', 'view', 'fa-icon'),
            ];
        });
    }

    /**
     * Customize Spark's profile update logic.
     *
     * @return void
     */
    protected function customizeProfileUpdates()
    {
        // Spark::validateProfileUpdatesWith(function (Request $request) {
        //     return [
        //         'name' => 'required|max:255',
        //         'email' => 'required|email|unique:users,email,'.$request->user()->id,
        //     ];
        // });

        // Spark::updateProfilesWith(function (Request $request) {
        //     // Update $request->user()...
        // });
    }

    /**
     * Customize the subscription plans for the application.
     *
     * @return void
     */
    protected function customizeSubscriptionPlans()
    {
        // Spark::free()
        //         ->features([
        //             'Feature 1',
        //             'Feature 2',
        //             'Feature 3',
        //         ]);

        // Spark::plan('Basic', 'stripe-id')->price(10)
        //         ->trialDays(7)
        //         ->features([
        //             'Feature 1',
        //             'Feature 2',
        //             'Feature 3',
        //         ]);
    }
}
Let's walk through it one piece at a time.
$invoiceWith
This will customize the invoices that Spark generates. Put your information here, it ends up on the PDF. Done.
    protected $invoiceWith = [
        'vendor' => 'Your Company',
        'product' => 'Your Product',
        'street' => 'PO Box 111',
        'location' => 'Your Town, 12345',
        'phone' => '555-555-5555',
    ];
customizeRegistration()
This allows you to add your own validation requirements and customize the user creation process.
    protected function customizeRegistration()
    {
        // Spark::validateRegistrationsWith(function (Request $request) {
        //     return [
        //         'name' => 'required|max:255',
        //         'email' => 'required|email|unique:users',
        //         'password' => 'required|confirmed|min:6',
        //         'terms' => 'required|accepted',
        //     ];
        // });

        // Spark::createUsersWith(function (Request $request) {
        //     // Return New User Instance...
        // });
    }
The createUsersWith function is run in the registration controller like this:
    // Laravel\Spark\Repositories\UserRepository
    protected function createNewUser(Request $request, $withSubscription)
    {
        if (Spark::$createUsersWith) {
            return $this->callCustomUpdater(Spark::$createUsersWith, $request, [$withSubscription]);
        } else {
            return $this->createDefaultUser($request);
        }
    }
And, just for your customization purposes, this is what that method will do if you don't override it:
    // Laravel\Spark\Repositories\UserRepository
    protected function createDefaultUser(Request $request)
    {
        $model = config('auth.model');

        return (new $model)->create([
            'name' => $request->name,
            'email' => $request->email,
            'password' => bcrypt($request->password),
        ]);
    }
customizeRoles()
By default, Spark has a role system for the Teams setting. You can set up your list of roles and your default here.
    protected function customizeRoles()
    {
        Spark::defaultRole('member');

        Spark::roles([
            'admin' => 'Administrator',
            'member' => 'Member',
        ]);
    }
customizeSettingsTabs()
By default, Spark creates an account/admin panel with a few default tabs. You can remove tabs, re-order them, or add your own.
If you're using Teams, you can also customize the Team tabs.
    protected function customizeSettingsTabs()
    {
        Spark::settingsTabs()->configure(function ($tabs) {
            return [
                $tabs->profile(),
                $tabs->teams(),
                $tabs->security(),
                $tabs->subscription(),
                // $tabs->make('Name', 'view', 'fa-icon'),
            ];
        });

        Spark::teamSettingsTabs()->configure(function ($tabs) {
            return [
                $tabs->owner(),
                $tabs->membership(),
                // $tabs->make('Name', 'view', 'fa-icon'),
            ];
        });
    }
    ```

##### customizeProfileUpdates()

Just like you could customize the validation logic and user creation process for user registration, you can do the same thing for the user profile update process.

```php
    protected function customizeProfileUpdates()
    {
        // Spark::validateProfileUpdatesWith(function (Request $request) {
        //     return [
        //         'name' => 'required|max:255',
        //         'email' => 'required|email|unique:users,email,'.$request->user()->id,
        //     ];
        // });

        // Spark::updateProfilesWith(function (Request $request) {
        //     // Update $request->user()...
        // });
    }
The default behavior in the ProfileController that you'd be overwriting in updateProfilesWith is:
Auth::user()->fill($request->all())->save();
customizeSubscriptionPlans()
Like the name suggests, this is where you determine what your plans are. You can add free plans, monthly plans, yearly plans, and define the price, number of trial days, and feature list.
This code snippet shows everything except a yearly plan, which you'd define by adding a ->yearly() fluent call to your plan definition.
    protected function customizeSubscriptionPlans()
    {
        // Spark::free()
        //         ->features([
        //             'Feature 1',
        //             'Feature 2',
        //             'Feature 3',
        //         ]);

        // Spark::plan('Basic', 'stripe-id')->price(10)
        //         ->trialDays(7)
        //         ->features([
        //             'Feature 1',
        //             'Feature 2',
        //             'Feature 3',
        //         ]);
    }
app/Team.php
There's a new model for Teams, if you're going to use them.
<?php

namespace App;

use Laravel\Spark\Teams\Team as SparkTeam;

class Team extends SparkTeam
{
    //
}
It's extending this model for customization (trimmed for brevity):
<?php

namespace Laravel\Spark\Teams;

...

class Team extends Model
{
    protected $table = 'teams';

    protected $fillable = ['name'];

    /**
     * Get all of the users that belong to the team.
     */
    public function users() {}

    /**
     * Get the owner of the team.
     */
    public function owner() {}

    /**
     * Get all of the pending invitations for the team.
     */
    public function invitations() {}

    /**
     * Invite a user to the team by e-mail address.
     *
     * @param  string  $email
     * @return \Laravel\Spark\Teams\Invitation
     */
    public function inviteUserByEmail($email) {}

    /**
     * Remove a user from the team by their ID.
     *
     * @param  int  $userId
     * @return void
     */
    public function removeUserById($userId) {}
}
database/migrations/DATE_create_teams_table.php
Here's the up migration:
        // Create Teams Table...
        Schema::create('teams', function (Blueprint $table) {
            $table->increments('id');
            $table->integer('owner_id')->index();
            $table->string('name');
            $table->timestamps();
        });

        // Create User Teams Intermediate Table...
        Schema::create('user_teams', function (Blueprint $table) {
            $table->integer('team_id');
            $table->integer('user_id');
            $table->string('role', 25);

            $table->unique(['team_id', 'user_id']);
        });

        // Create Invitations Table...
        Schema::create('invitations', function (Blueprint $table) {
            $table->increments('id');
            $table->integer('team_id')->index();
            $table->integer('user_id')->nullable()->index();
            $table->string('email');
            $table->string('token', 40)->unique();
            $table->timestamps();
        });
resources/assets/js/app.js
This is where your general application JavaScript should go, and it's pre-filled with some Spark JavaScript.
/*
 |--------------------------------------------------------------------------
 | Laravel Spark - Creating Amazing Experiences.
 |--------------------------------------------------------------------------
 |
 | First, we will load all of the "core" dependencies for Spark which are
 | libraries such as Vue and jQuery. Then, we will load the components
 | which manage the Spark screens such as the user settings screens.
 |
 | Next, we will create the root Vue application for Spark. We'll only do
 | this if a "spark-app" ID exists on the page. Otherwise, we will not
 | attempt to create this Vue application so we can avoid conflicts.
 |
 */

require('laravel-spark/core/dependencies');

if ($('#spark-app').length > 0) {
    require('./spark/components')

    new Vue(require('laravel-spark'));
}
resources/assets/js/spark/components.js
This pulls in the VueJS components for the individual pages.
/*
 |--------------------------------------------------------------------------
 | Spark Page Components
 |--------------------------------------------------------------------------
 |
 | These components control the user settings screens for Spark. You will
 | change these paths to your own custom components if you need to use
 | your own component to provide custom logic for your applications.
 |
 | In addition, the components which control the team settings and member
 | management are also included. Again, you may change these paths and
 | require your own custom-built components to manage these screens.
 */

require('laravel-spark/settings/dashboard/profile')
require('laravel-spark/settings/dashboard/security/password')
require('laravel-spark/settings/dashboard/security/two-factor')

require('laravel-spark/settings/team/owner')
require('laravel-spark/settings/team/membership/edit-team-member')
resources/views/home.blade.php
This is the default home page that we looked at before.
@extends('spark::layouts.app')

@section('content')
<!-- Main Content -->
<div class="container spark-screen">
    @if (Spark::usingTeams() && ! Auth::user()->hasTeams())

        <!-- Teams Are Enabled, But The User Doesn't Have One -->
        <div class="row">
            <div class="col-md-10 col-md-offset-1">
                <div class="panel panel-default">
                    <div class="panel-heading">You Need A Team!</div>

                    <div class="panel-body bg-warning">
                        It looks like you haven't created a team!
                        You can create one in your <a href="/settings?tab=teams">account settings</a>.
                    </div>
                </div>
            </div>
        </div>

    @else

        <!-- Teams Are Disabled Or User Is On Team -->
        <div class="row">
            <div class="col-md-10 col-md-offset-1">
                <div class="panel panel-default">
                    <div class="panel-heading">Dashboard</div>

                    <div class="panel-body">
                        Your Application's Dashboard.
                    </div>
                </div>
            </div>
        </div>

    @endif
</div>
@endsection
terms.md
This file will generate your "Terms of Service" page.
This page is generated from the `terms.md` file in your project root.
Looking at your installation
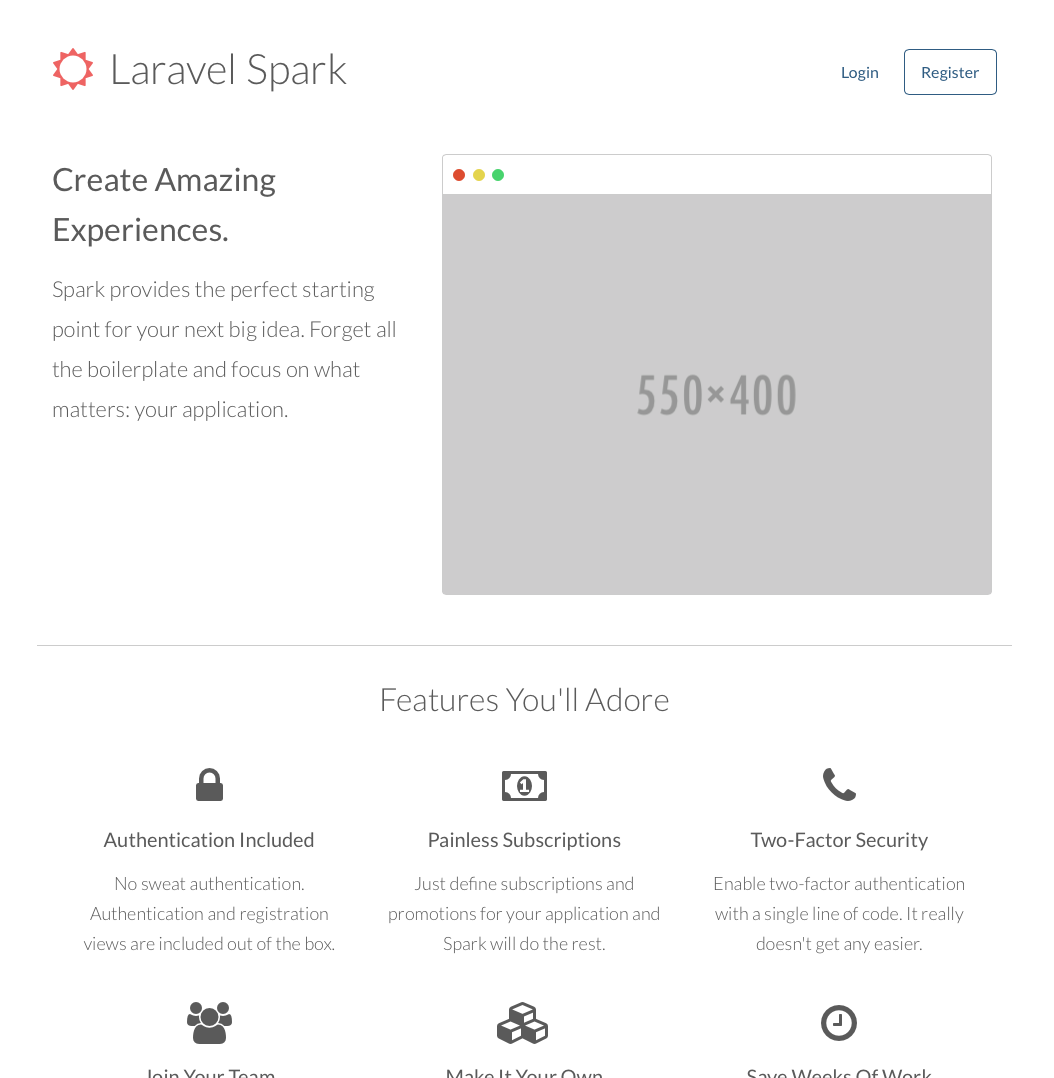
Phew. That was a lot. Let's actually see what we get here. First, we get the beautiful landing page we saw in the screenshot above. But what else?
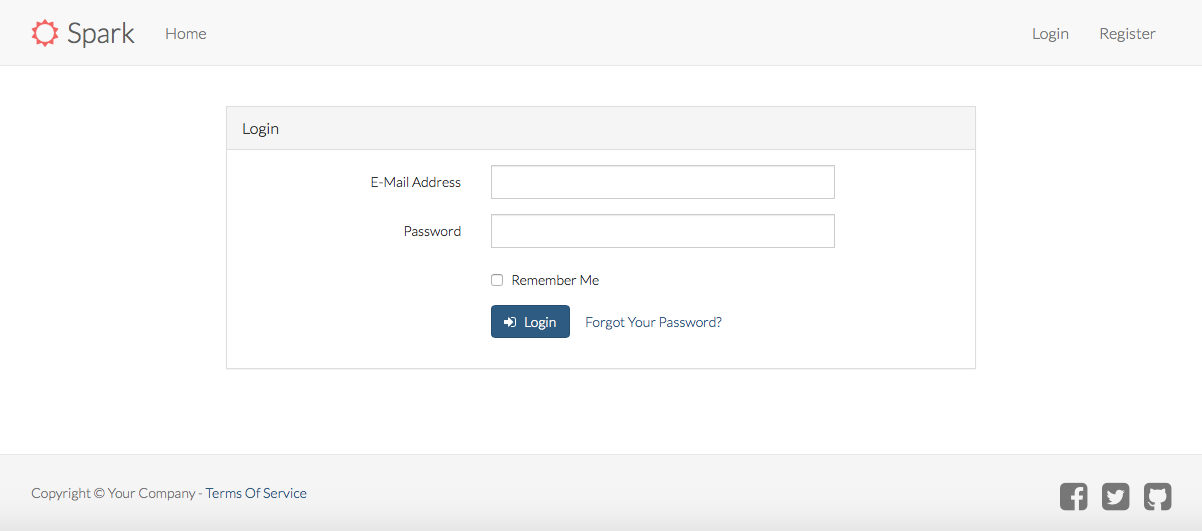
First, let's check out our login page. Notice we have a nice Bootstrap-based layout with a fixed footer, Copyright information, and some basic social links.
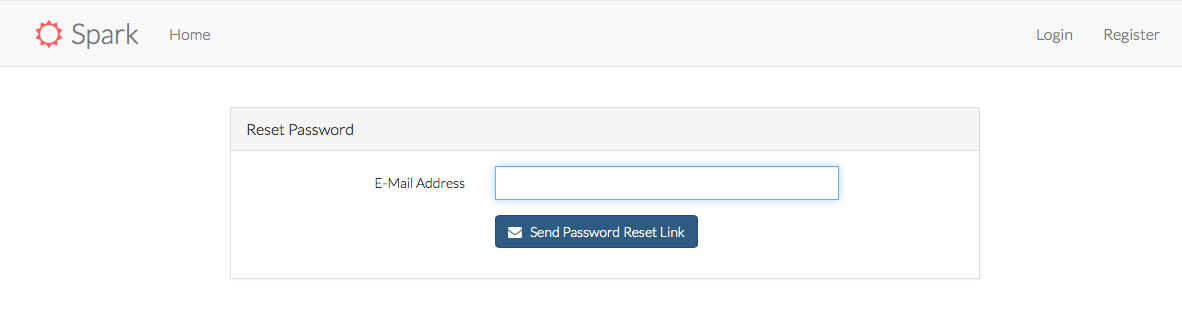
We also got a Password Reset page:
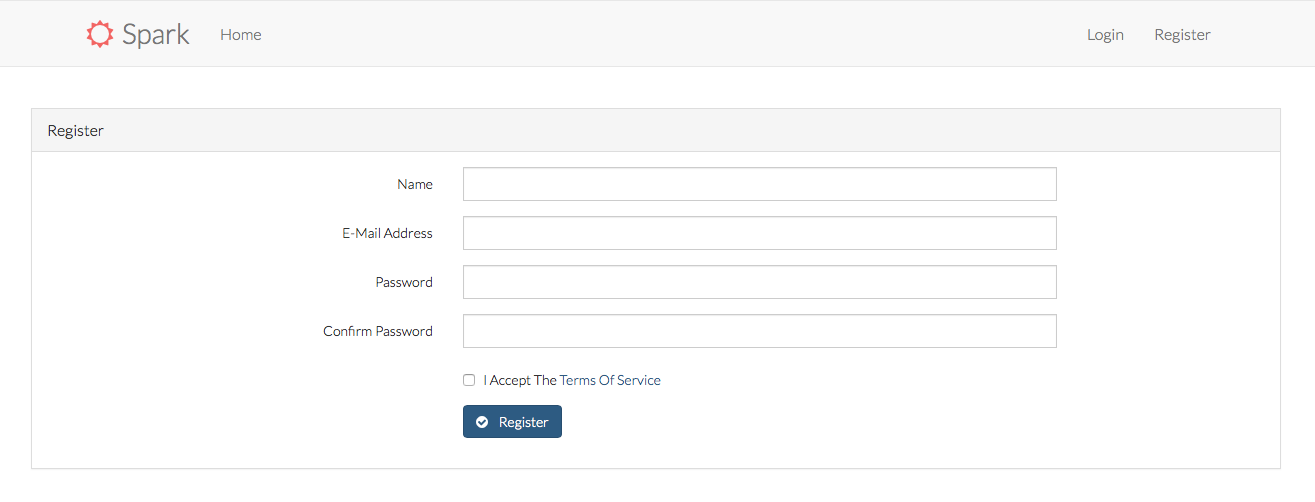
And a Register page:
And terms of service:

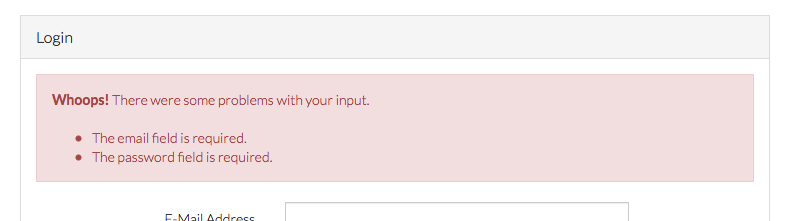
Notice we also have error handling baked in:
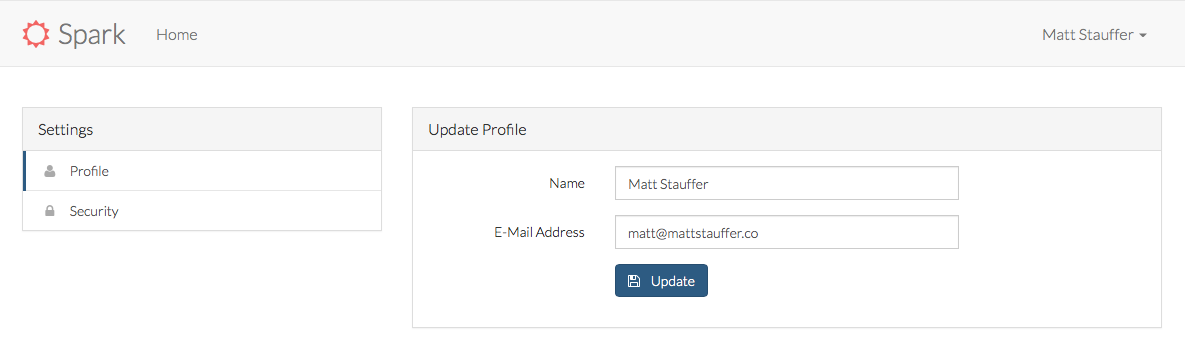
OK, time to register. Once we do, we hit the dashboard (/home), which has a dropdown menu allowing us to logout and edit our settings:

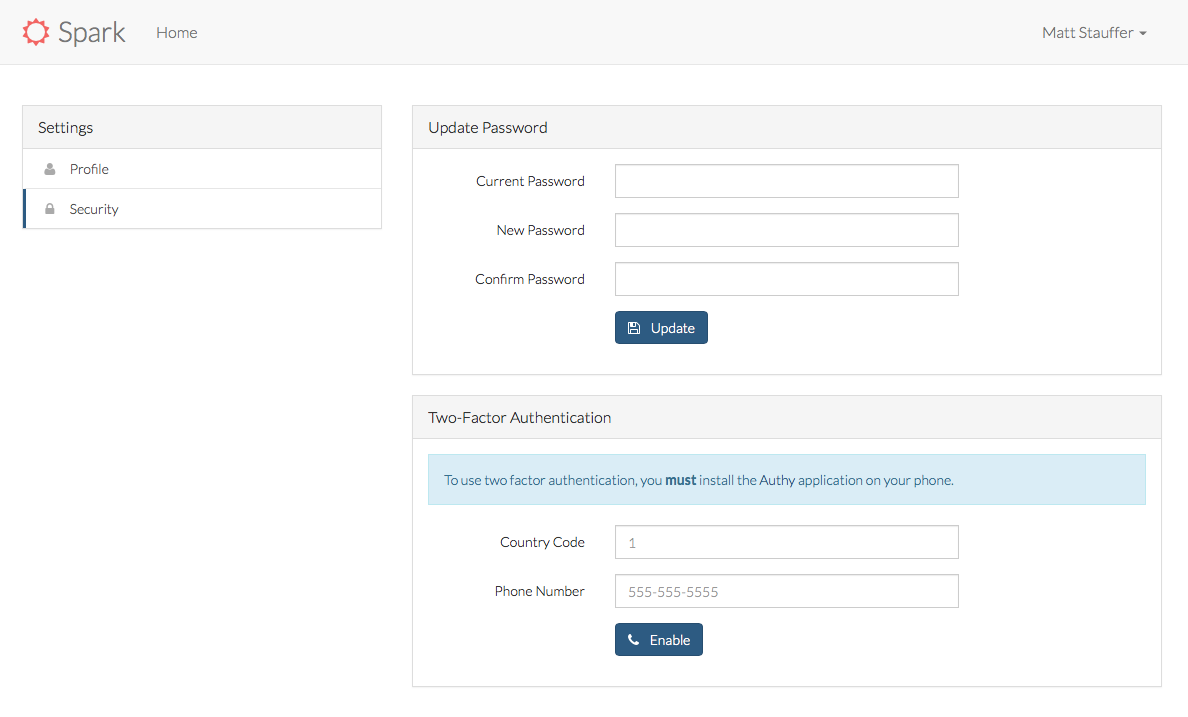
Let's check out that User Settings Page. Notice that these are the tabs that we could've edited in the SparkServiceProvider above.
Edit your password and two-factor auth:
That's it out-of-the-box. Let's explore some more concepts.
Teams
In order to enable your users to join teams, you need to use the CanJoinTeams trait in your User model. Thankfully, Spark already imported that class in your User model's import block, so it's as simple as adding CanJoinTeams to the use Trait list in your model:
// app/User.php
class User ...
{
    use Authorizable, Billable, CanJoinTeams, CanResetPassword, TwoFactorAuthenticatable;
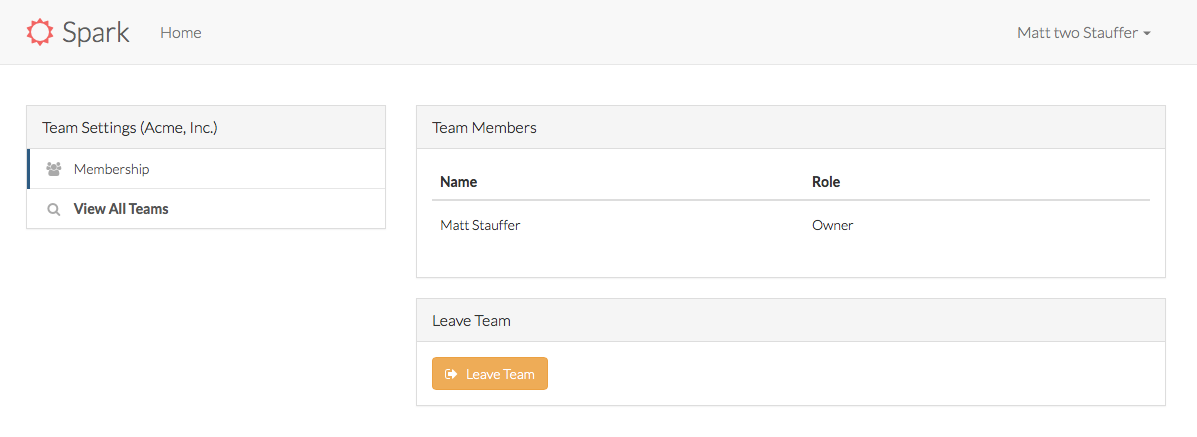
Now when we visit our user settings panel, we see something a little different:
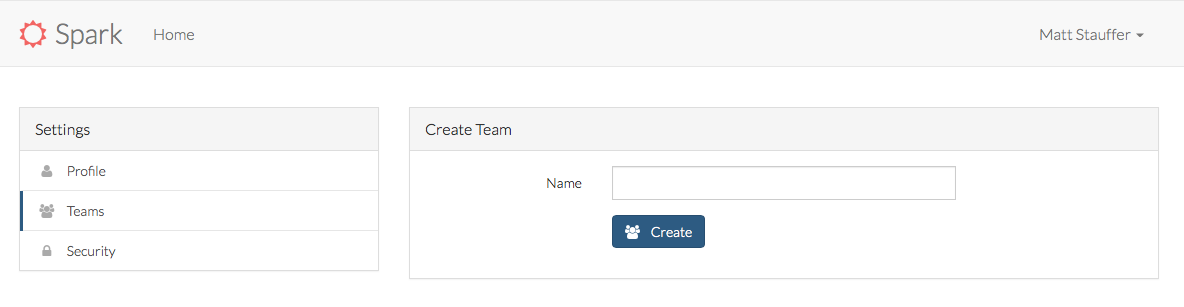
Let's add a team.
In this context, I choose to think of a Team as like an Account. We have a web app where you login, pay, and see your data not by a single user account, but by a Team/Group which has a single Owner. The Owner is responsible for paying and appointing admins; the admins and owner can invite and delete other users. Every user on the team uses it and accesses the same data, possibly with unique roles.
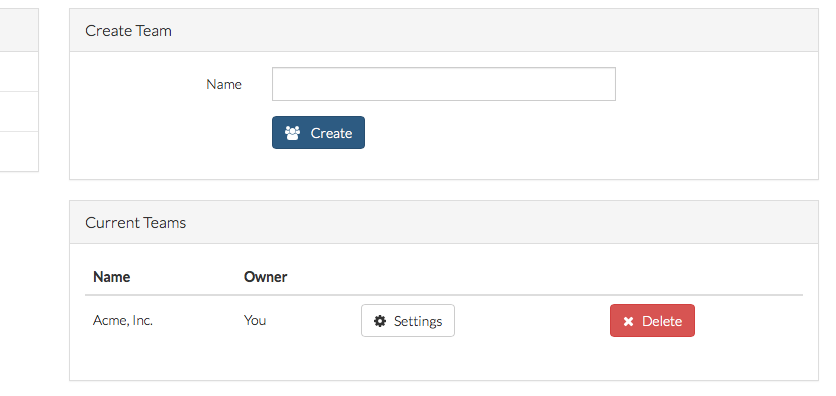
So, let's try editing a team and see what we get.

Of course, we want to invite someone else to our team.
Note: if you get a validation error the first time you try to invite someone to your team, check your logs; it's likely because the default Mail configuration (in
.env) sends to Mailtrap.io. You can either change this, or set up Mailtrap so that your email works.
Here's what we see until they accept:

And what they see once they click the link in their email:
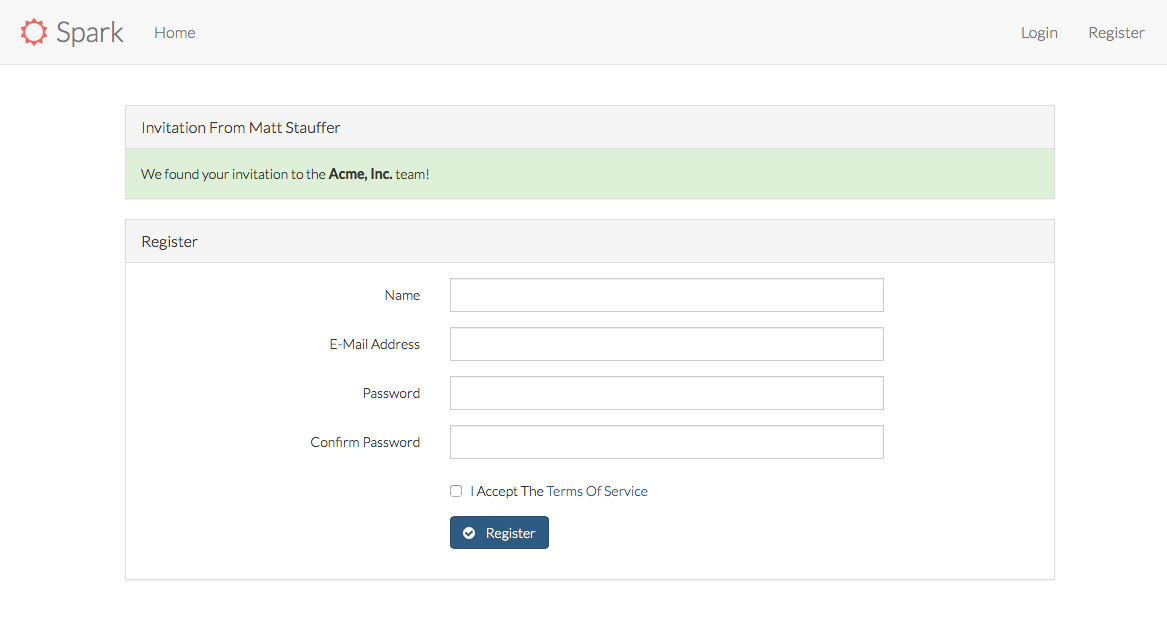
Once that user signs up, they'll have the opportunity to leave your team:
Note: There are no default restrictions around creation of teams. Users can create as many teams as they like. It's up to you to constrain them using
validateNewTeamsWith().
If you want to customize the validation of new team creation, check out the validateNewTeamsWith() method. As of the writing of this post, it's not shown by default in SparkServiceProvider, but you can go into the customizeSpark() method and add a call to it:
protected function customizeSpark()
{
    Spark::configure(...);

    Spark::validateNewTeamsWith(function() {
        // Validate here...
    });
}
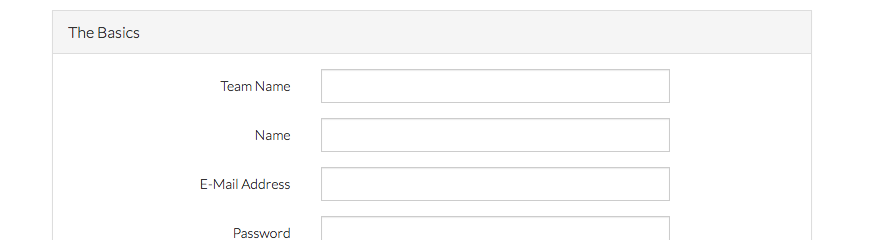
Also, note that, if you have teams enabled, you'll be prompted to name your team when you sign up:
Once you add the CanJoinTeams trait to your user model, they'll gain a few useful methods, including:
$user->hasTeams() shows whether they have any teams that they're associated with.
$user->current_team or $user->currentTeam() accesses the currently-selected team.
$user->ownsTeam($team) determines whether the user owns the team passed in.
$user->teamRole($team) gets the role for the member's relationship to the team passed in.
Payments & Plans
Until now, every sample I've show has been how the app works without Stripe and plans set up. Let's now go add a Stripe key and secret and add some plans to the SparkServiceProvider.
Like with Cashier, you need to add the plan to Stripe first. Let's add a free plan, and a yearly and monthly version of the same plan. Now, let's add them to the SparkServiceProvider:
    // SparkServiceProvider
    protected function customizeSubscriptionPlans()
    {
        Spark::free()
                ->features([
                    'Feature 1',
                    'Feature 2',
                    'Feature 3',
                ]);

        Spark::plan('Basic Monthly', 'basic-monthly')->price(10)
                ->trialDays(7)
                ->features([
                    'Feature 1',
                    'Feature 2',
                    'Feature 3',
                ]);

        Spark::plan('Basic Yearly', 'basic-yearly')->price(120)
                ->trialDays(7)
                ->yearly()
                ->features([
                    'Feature 1',
                    'Feature 2',
                    'Feature 3',
                ]);
    }
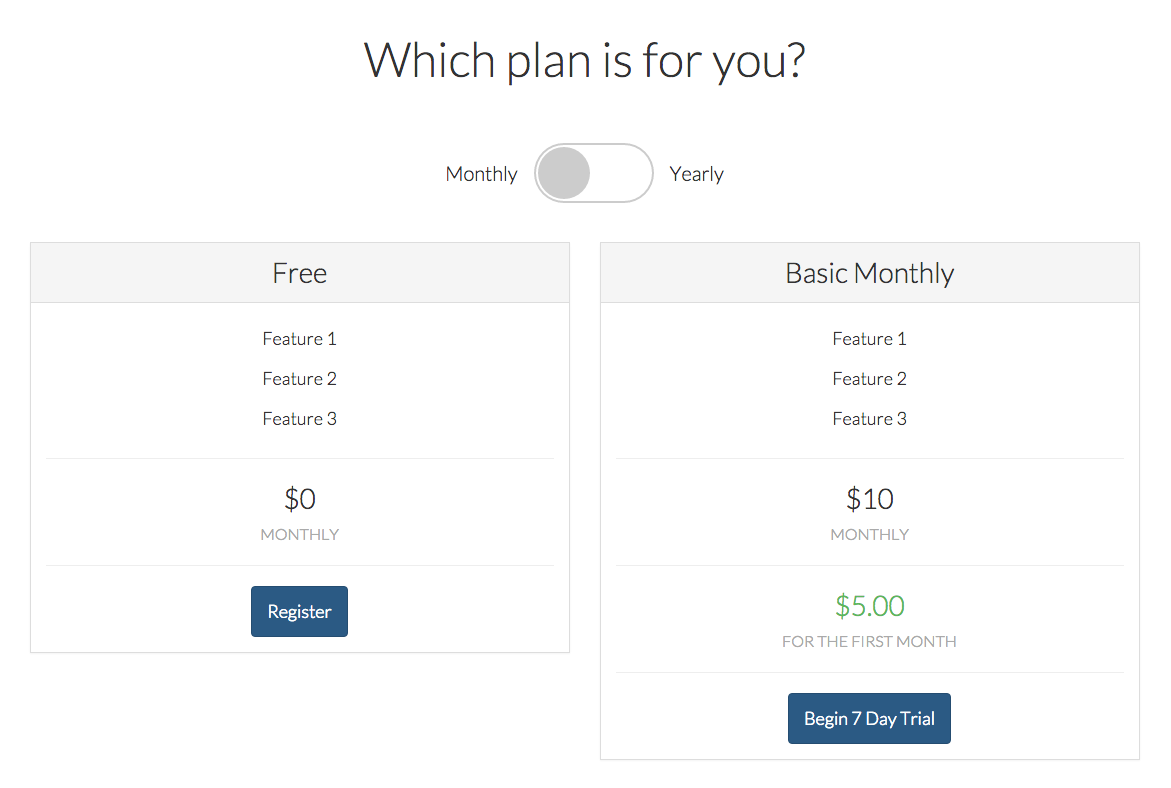
All of a sudden, we get a Subscription tab:

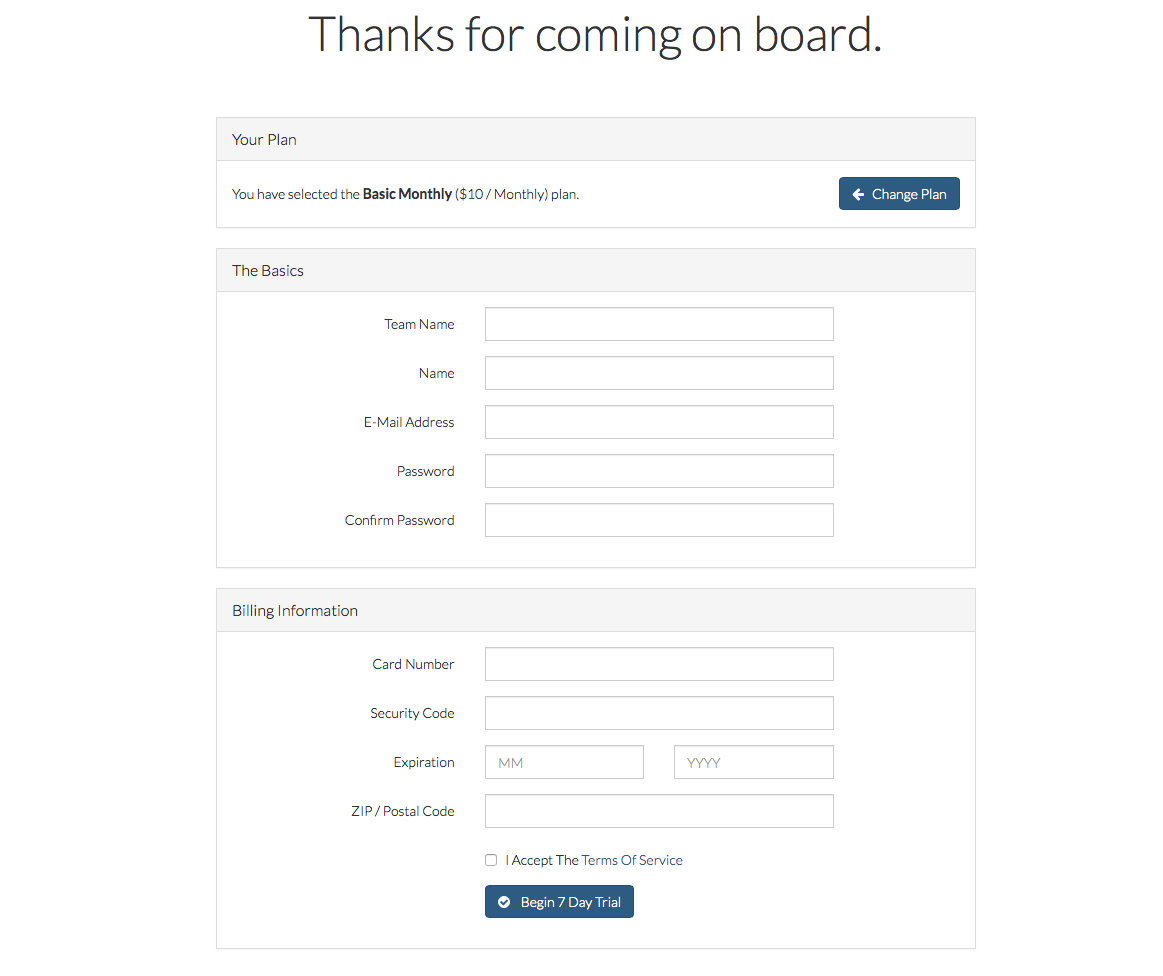
And check the registration flow now:
Then the registration page, taking your payment information:
You can check their plan in your code:
Auth::user()->getStripePlan();
Coupons
Spark passes coupon requests along to Stripe, so you don't need to do anything to add them except to add the coupon to Stripe. Just have the users pass the coupon as a parameter when they visit the registration page:
http://yourapp.com/register?coupon=yourCouponCodeHere
Without having to write any code, you just got your coupon hooked right in:
You can also temporarily add a site-wide coupon by adding this in the SparkServiceProvider (likely in the customizeSpark() method):
Spark::promotion('coupon-code-here');
Roles
You can define the roles for your team in SparkServiceProvider like we showed above.
    // SparkServiceProvider
    protected function customizeRoles()
    {
        Spark::defaultRole('member');

        Spark::roles([
            'admin' => 'Administrator',
            'member' => 'Member',
        ]);
    }
You can customize the default role, choose the options (each with a key and a label), and once you create these roles you can check for them elsewhere:
echo Auth::user()->teamRole(Auth::user()->current_team);
I'm guessing there will be (or there are already and I haven't found it yet) simpler ways to get and check this sort of information, but it's in there already if you use code like the above.
Views
By default Spark publishes a few views. If you want more, there are two options: one for the basic views, and another for all views.
php artisan vendor:publish --tag=spark-basics
Which outputs these views:
resources/views/vendor/spark/emails/auth/password/email.blade.php
resources/views/vendor/spark/emails/billing/invoice.blade.php
resources/views/vendor/spark/emails/team/invitations/new.blade.php
resources/views/vendor/spark/emails/team/invitations/existing.blade.php
resources/views/vendor/spark/welcome.blade.php
resources/views/vendor/spark/nav/guest.blade.php
resources/views/vendor/spark/layouts/app.blade.php
resources/views/vendor/spark/common/footer.blade.php
resources/views/vendor/spark/nav/authenticated.blade.php
resources/views/vendor/spark/layouts/common/head.blade.php
resources/views/vendor/spark/settings/tabs/profile.blade.php
resources/views/vendor/spark/settings/tabs/security.blade.php
resources/views/vendor/spark/settings/team/tabs/owner.blade.php
resources/views/vendor/spark/auth/registration/simple/basics.blade.php
resources/views/vendor/spark/auth/registration/subscription/basics.blade.php
resources/views/vendor/spark/settings/team/tabs/membership/modals/edit-team-member.blade.php
Or, there's the full export:
php artisan vendor:publish --tag=spark-full
This outputs every file in the entire spark directory, which is far too many to list here. They'll all end up in resources/views/vendor/spark.
Miscellaneous
Disabling Authy
If you want to disable Two-Factor Authentication, add a protected $twoFactorAuth = false; property on your SparkServiceProvider.
Other
The Spark class has a few other methods available on it; here are a few of note:
Spark::forcingPromotion() returns whether or not we're forcing a promotion site-wide at the moment.
Spark::retrieveusersWith() allows you to customize the method Spark uses to retrieve the current user.
Conclusion
You made it! This is a LOT, I know. Once Spark is settled, I'll write another bog post that's less of a deep dive and more of a general introduction to how Spark works, but since you're brave and looking at the alpha, I gave you a deeper dive.
In general, I couldn't be more excited about Spark. We write this sort of code so often and having a pre-built set of tools to do it for you--especially with as much nuance and customization as Spark provides--is amazing.
There's a lot more going on under the hood. I just revealed the pieces here that I think will be most interesting. Like I wrote before, this will all change; I'll do my best to keep it up to date, but I'd love your help in pointing out if I've missed anything.


Comments? I'm @stauffermatt on Twitter
Tags: laravel • spark