How to get started live streaming on Twitch and YouTube
!Warning: This post is over a year old. I don't always update old posts with new information, so some of this information may be out of date.
I recently wrote a huge post about how to set up your office or home office with lights, webcams, and audio for a variety of groups: remote workers, podcasters, live streamers, and more.
The most common request I received after sharing that post was: "How do I get started live streaming?"
I've been streaming on Twitch (twitch.tv/mattstauffer) for a few years and recently I've started streaming to YouTube (youtube.com/mattstauffer). I'm still definitely no professional streamer, but I'd love to share what I've learned with you so far.
Here's what we're going to cover:
- TL;DR: How to start streaming, NOW
- The basics of streaming
- Software
- OBS Settings and Scenes
- Screen size
- Hardware
- Integrations
- Editing and releasing after the stream
- Tips and Tricks
Just so you know, I'm going to be describing a few generic options, and then going deep into my particular setup. It's not the only way—it's just the way I've chosen, for now. Also, I work on a Mac, so I only have experience with Mac software.
1. TL;DR: How to start streaming NOW
If you want to get started streaming as fast as possible, here are your quick steps.
- Sign up for Twitch or YouTube
- Download OBS and plug in your Twitch or YouTube credentials (How to connect YouTube to OBS, How to connect Twitch to OBS)
- Create a single scene in OBS called "streaming" that has two sources: a capture of your screen and your mic
- Hit the "stream" button and have fun!
OK, so you want to do it a bit better than that?
- Add another source on your scene for your webcam. Throw it up in a corner somewhere
- If you're using Twitch, open the Twitch chat in a popup and show it on the edge of your screen. Maybe use window management software like Divvy to help keep it in a consistent spot.
- Point a lamp at your face so you have decent light
- Get some of the entry level equipment from my equipment post for better audio and video
Good? Great. Let's dive into the details.
2. The basics of streaming
When it comes to streaming, there are definitely a few concepts that might be a bit new, so let's cover the basics.
What is streaming?
First, streaming means sending some input source (or sources) from your machine to the Internet for people to watch live. Many streaming services allow for playback after the stream is over, but the primary core is just that you're sending something to the server and it can be viewed at the same time (minus transmission and encoding/decoding delays).

What can I stream?
That "something" you send will usually be a video capture of your desktop, some audio from a microphone, and often video from a webcam and the audio captured from your computer. But it can also include output from specific web sites, audio and video capture from other apps (like Skype), text-based rendering, graphics, animations, and more.
What else?
Most streaming services spin up a chat room for each stream, so the folks watching can chat about the stream (or anything else). Some streamers choose to engage with the chat live on the stream; others choose not to.
You'll stream using specialized software that's created solely for the purpose of recording and streaming video.
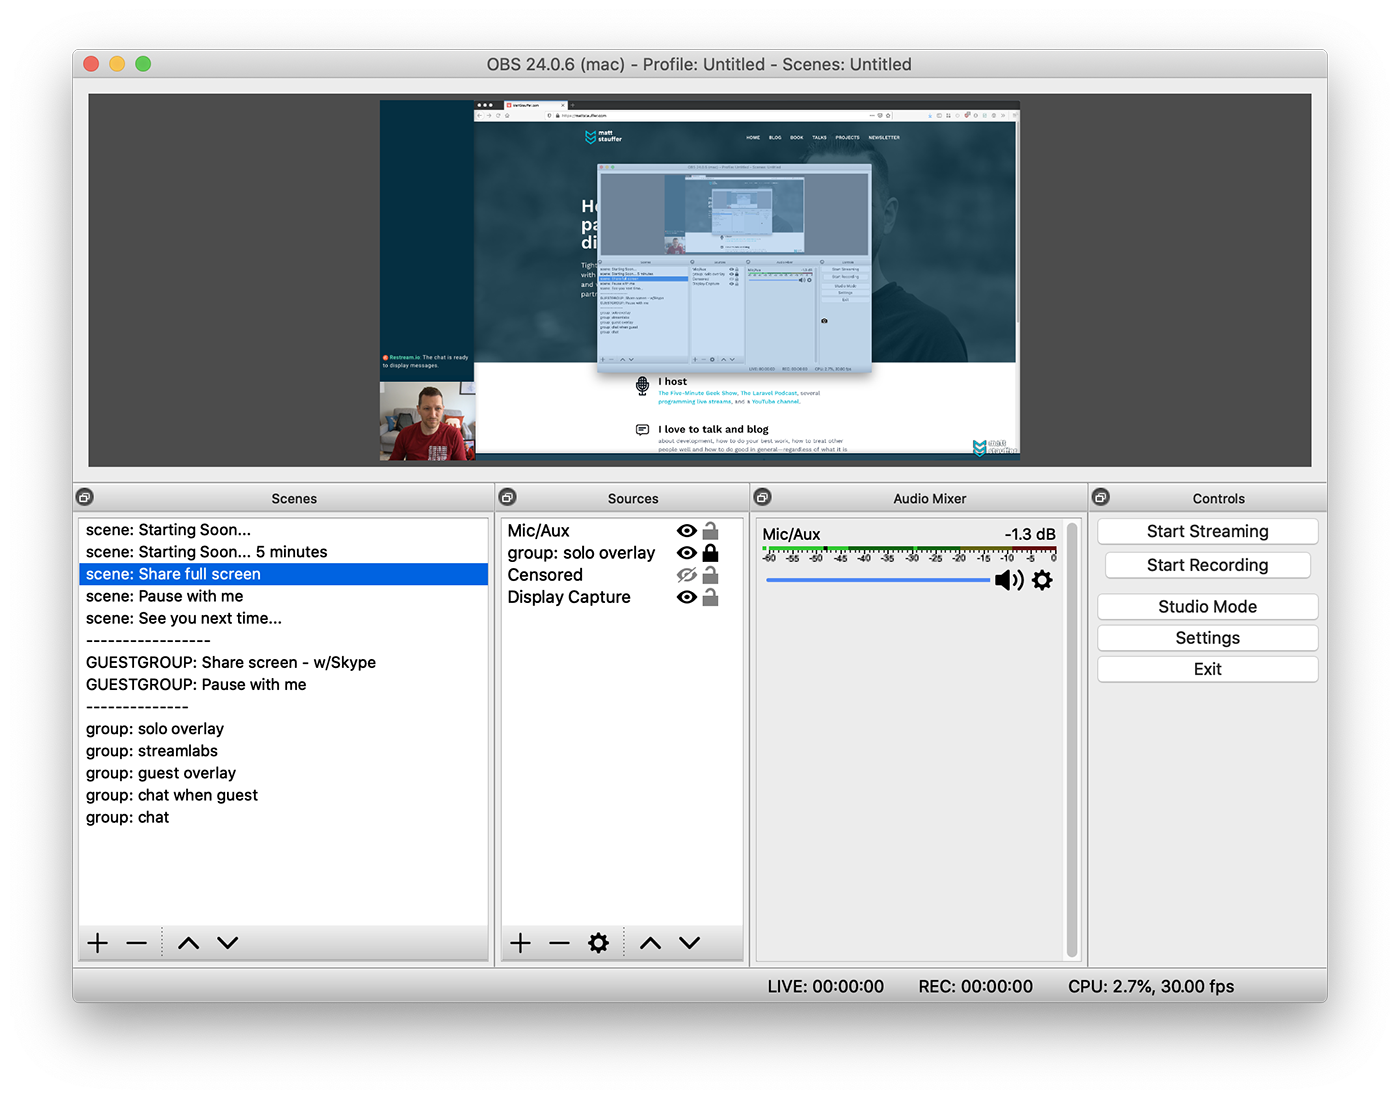
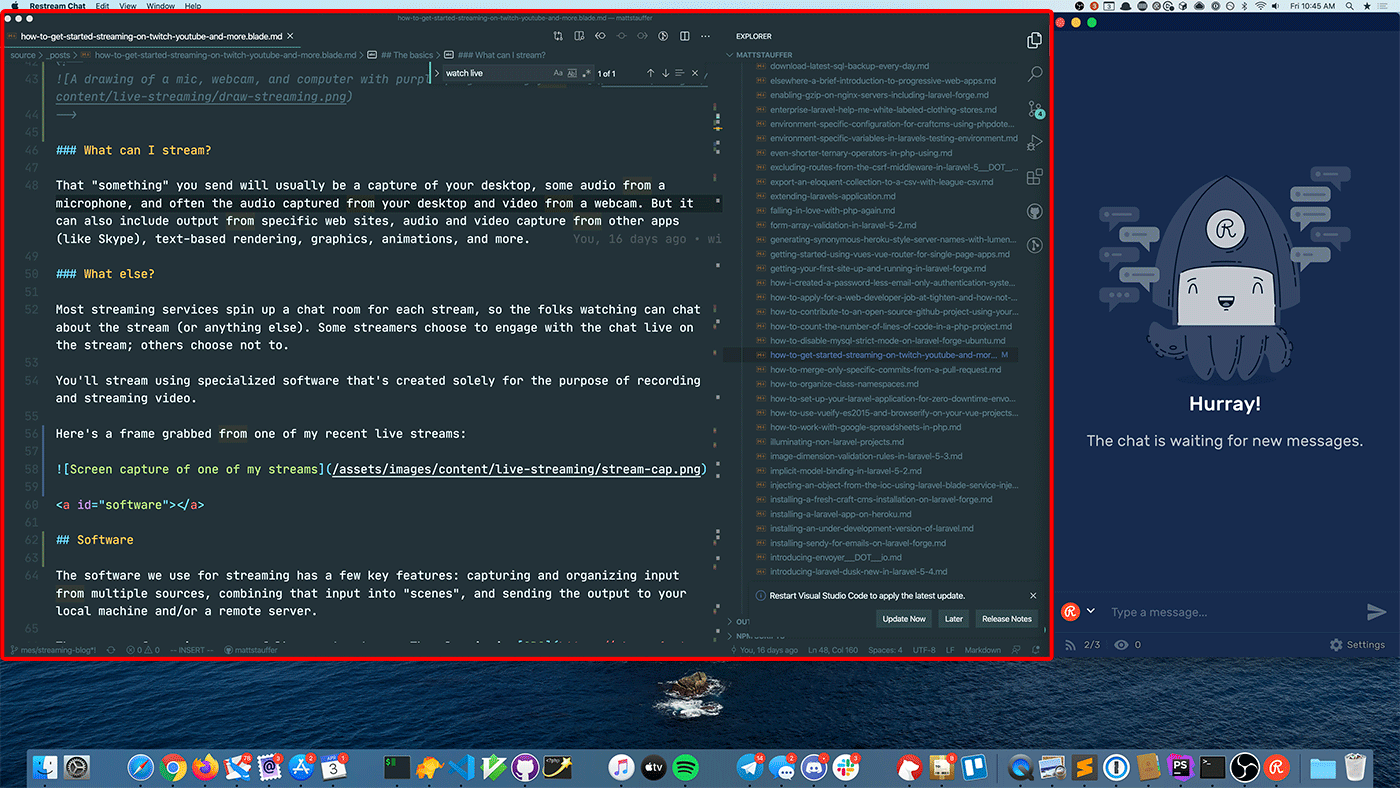
Here's a frame grabbed from one of my recent live streams:
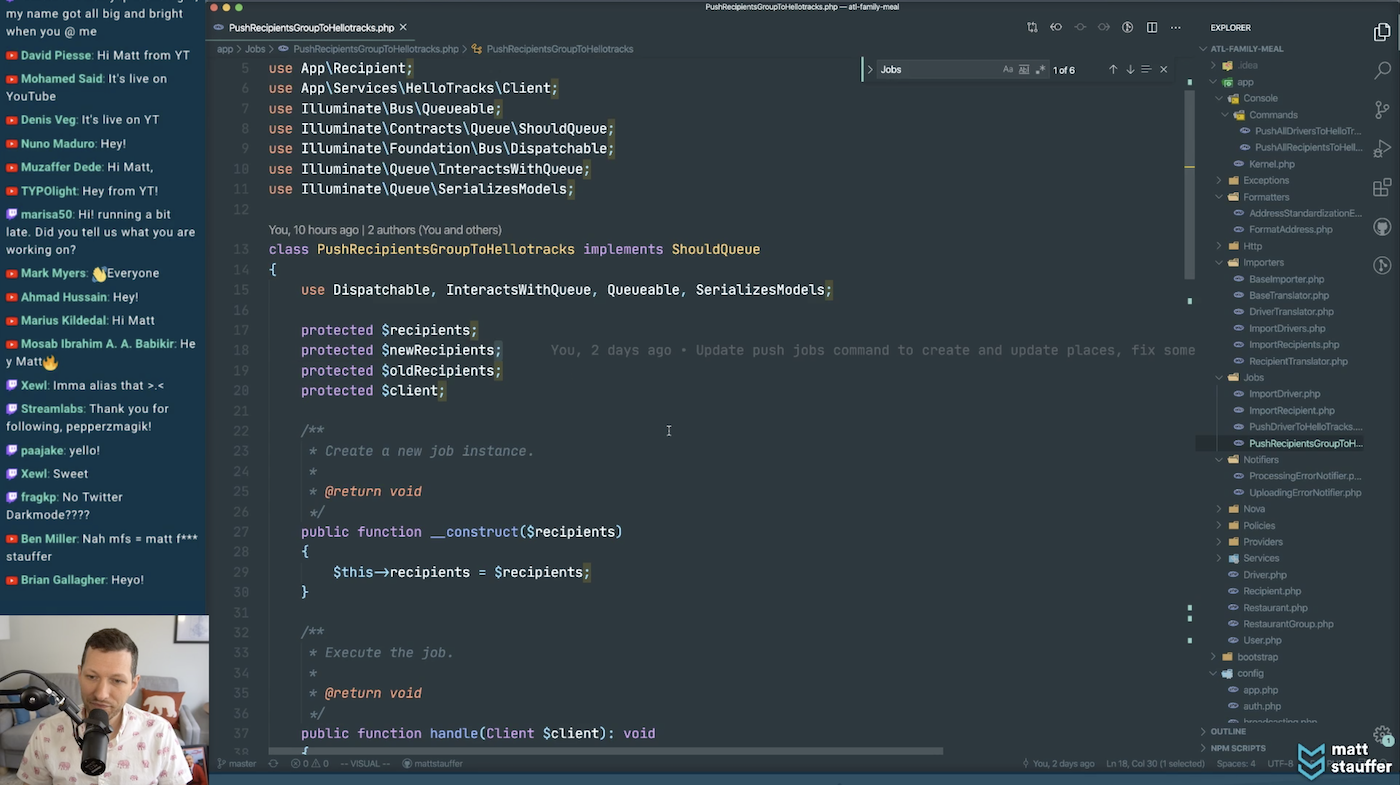
You can see that, during the majority of the stream, viewers see me, my screen, and the chat. They also hear my microphone and any audio that's generated by my computer.
3. Software
The software we use for streaming has a few key features: capturing and organizing input from multiple sources, combining that input into "scenes", and sending the output to a remote server (and, optionally, saving it locally to your machine).
There are a few primary apps folks use to stream.
- OBS: Open Broadcaster Software is the classic streaming tool. It's probably more barebones than the others; however, you can do basically everything with it, it's proven its abilities over a long time, and it's free and open source.
- Streamlabs OBS: Streamlabs OBS is OBS under the hood, but with a custom user interface. I've heard good things about it, but never used it, because it's always been Windows-only (until a few days before I posted this article). It's also free and open source.
- Ecamm Live: If you're willing to pay, a few of my friends use Ecamm, which is $12/month. I'm not entirely sure what it adds that's worth the cost but I'm sure there's something.
Note: Right before I published this article, the beta of Streamlabs OBS for Mac was released. Everything I say about OBS in this article will still apply; if I try Streamlabs OBS and like it, I'll update this post to mention it. From what I've heard, the beta is currently a bit too flaky to recommend you to start with it.
Each of these tools capture input, allow you to organize and combine the input, and then encode the resulting video and audio. When you set them up, you'll define the service (Twitch, YouTube, etc.) and then provide your API key for that service, and that's it!
4. OBS Settings and Scenes
I originally used OBS mainly because my friend Chris Pitt was the first person who got me streaming, and he used OBS. Since then I've heard good things about Streamlabs OBS, but even if it is pretty nice, it's still OBS under the hood. So, let's learn some OBS.
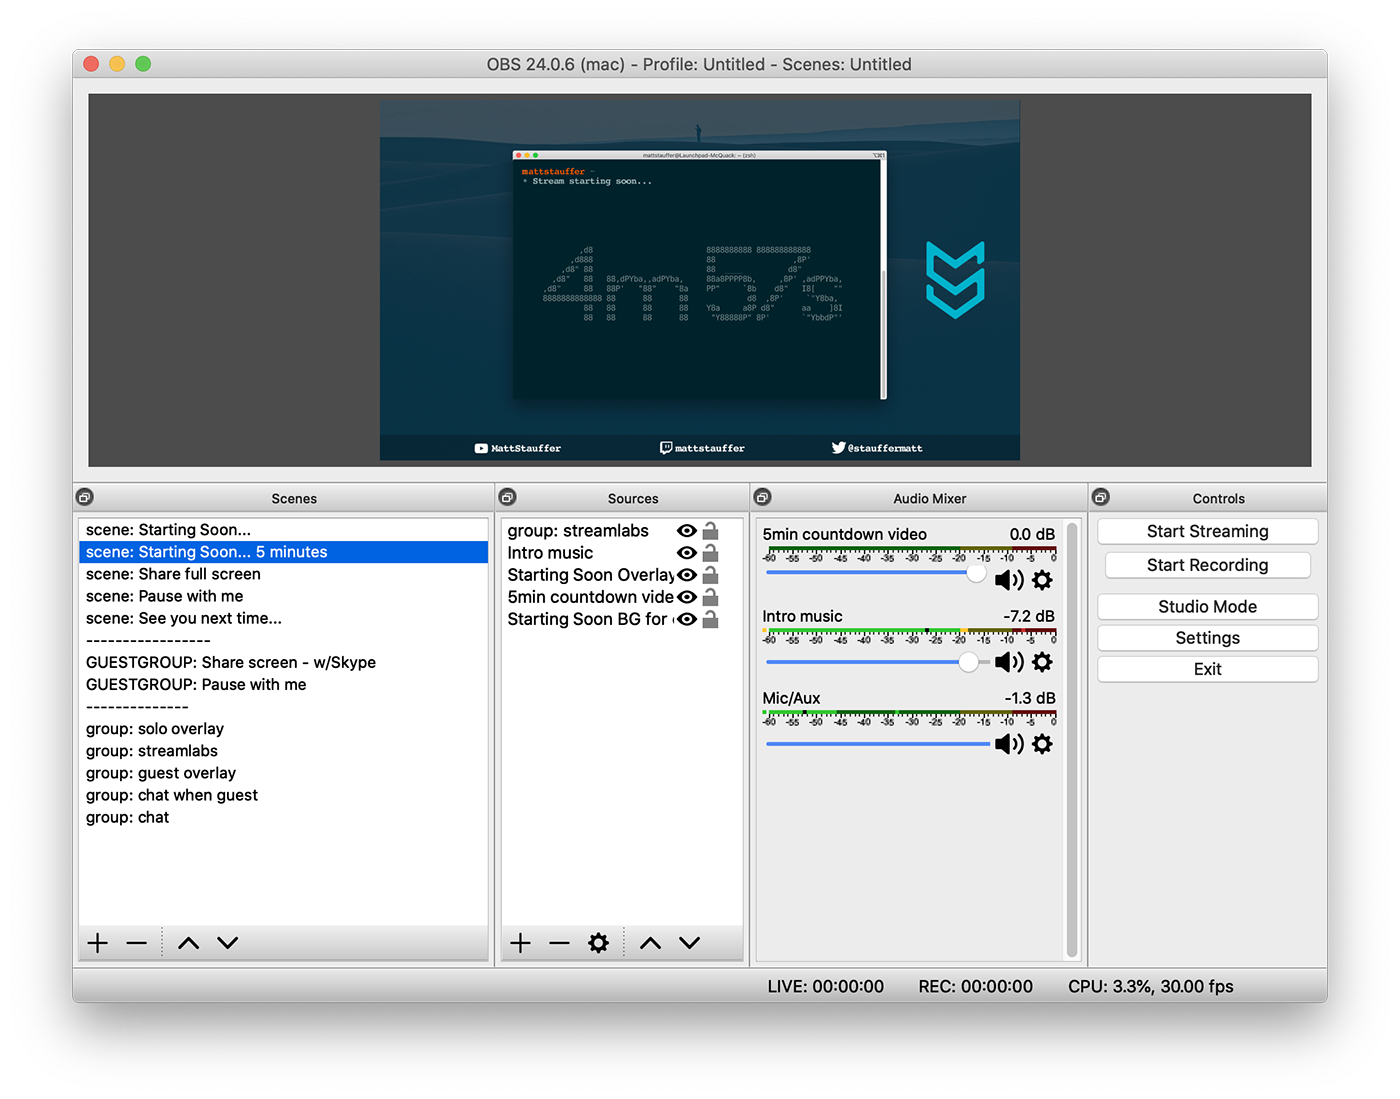
Here's what my basic OBS setup looks like:
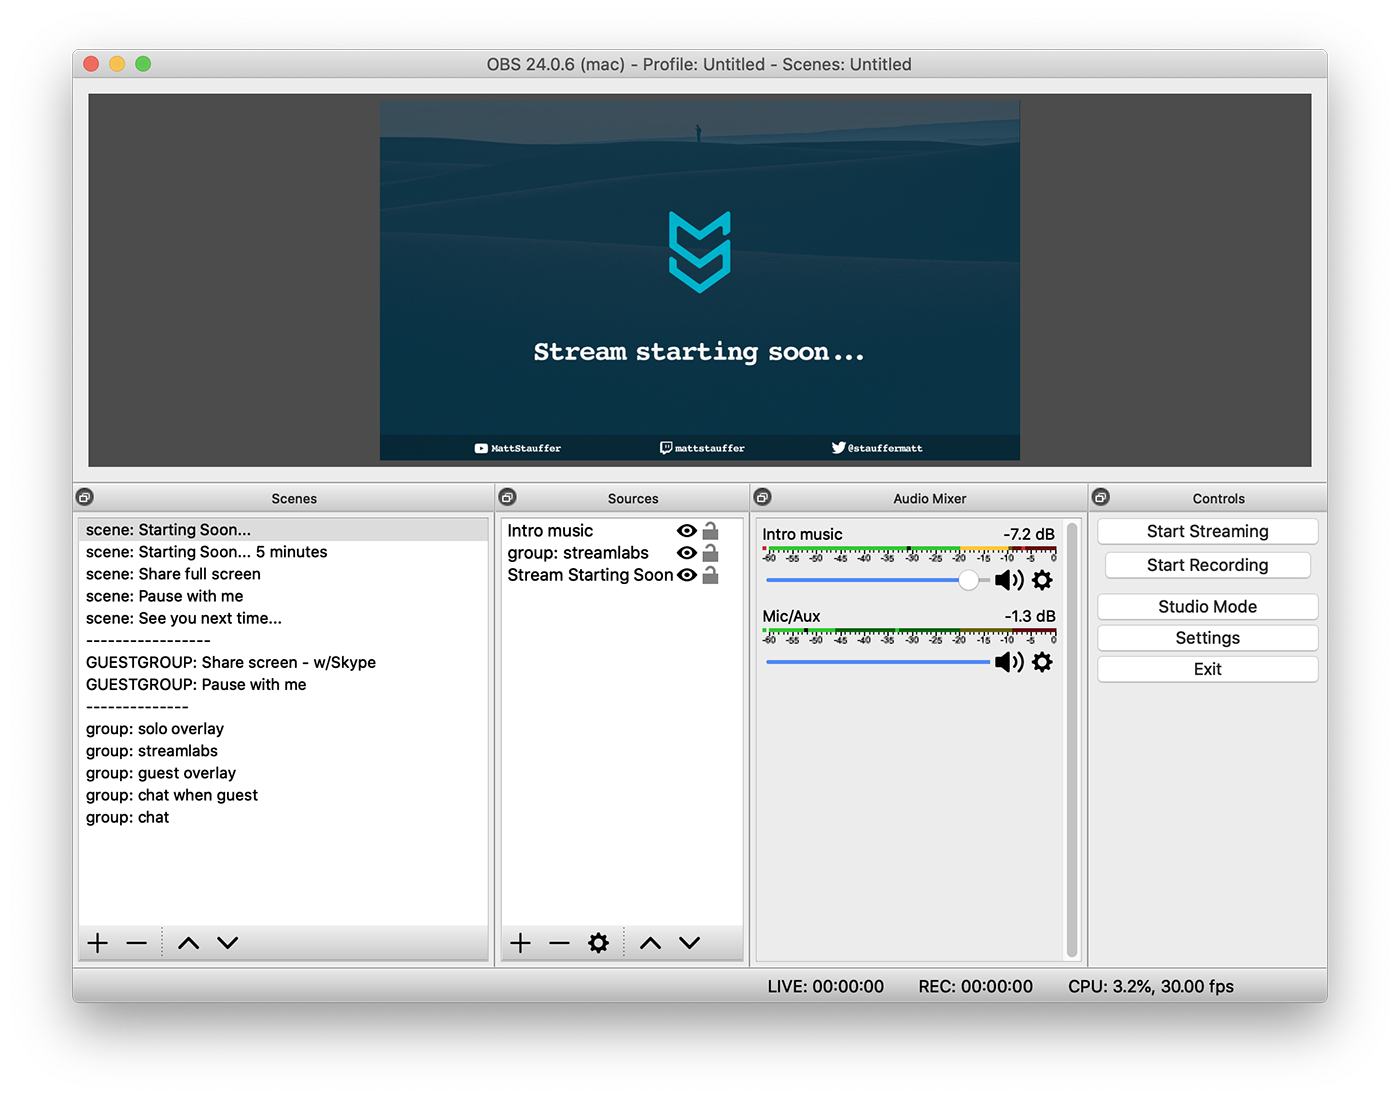
You'll see a preview of the stream in the top; panels below for your scenes, sources, audio sources, and some controls.
Scenes are the tool you'll use in OBS to organize and lay out the content you're sending in your stream. As you can see, I have scenes laid out for each of the main scenarios I might be in any time I'm streaming.
Sources are audio or visual inputs. The audio inputs are usually microphones, sound capture from an app or web site, or pre-recorded music. Visual inputs will be usually be screen captures of an entire screen or a single window, an embedded web site, or a pre-recorded video or pre-made graphic.
Organizing Scenes
In the scenes panel of that image above, you can see how I've organized my scenes.
The simplest scenes are a single video source and a single audio source. One webcam, one audio source. In the middle of the picture you can see a column labeled "Sources"; this is where you determine which sources will be a part of the scene you have currently selected.
But when you start building more complicated scenes—for example, if you're following the common pattern of layering graphics on top of your screen capture, and putting your webcam in a hole in the graphics—you may find yourself wanting to compose the scenes using different groups of sources.
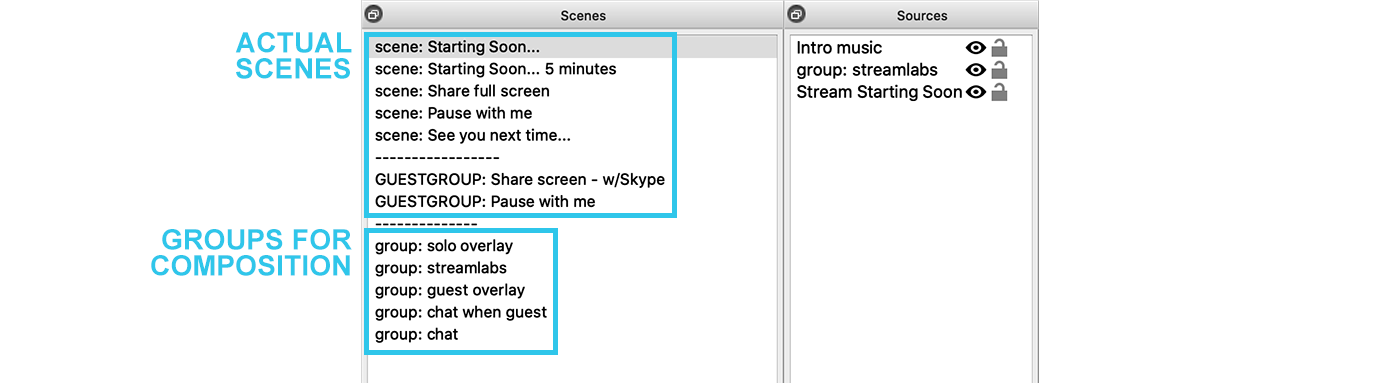
Thankfully, it is possible to compose your scenes! You can embed a scene in another scene. As you can see, I have added prefixes to all of my scenes. Those which start with "scene" are for selecting during a live stream. Those which start with "group" are for using to compose the above scenes (and "GUESTGROUP" are misnamed, because they're really guest scenes, but I only just noticed that).
My Scenes
I'm going to show you some of my scenes quickly, but if you want to skip over them, tap here to move to the next section.
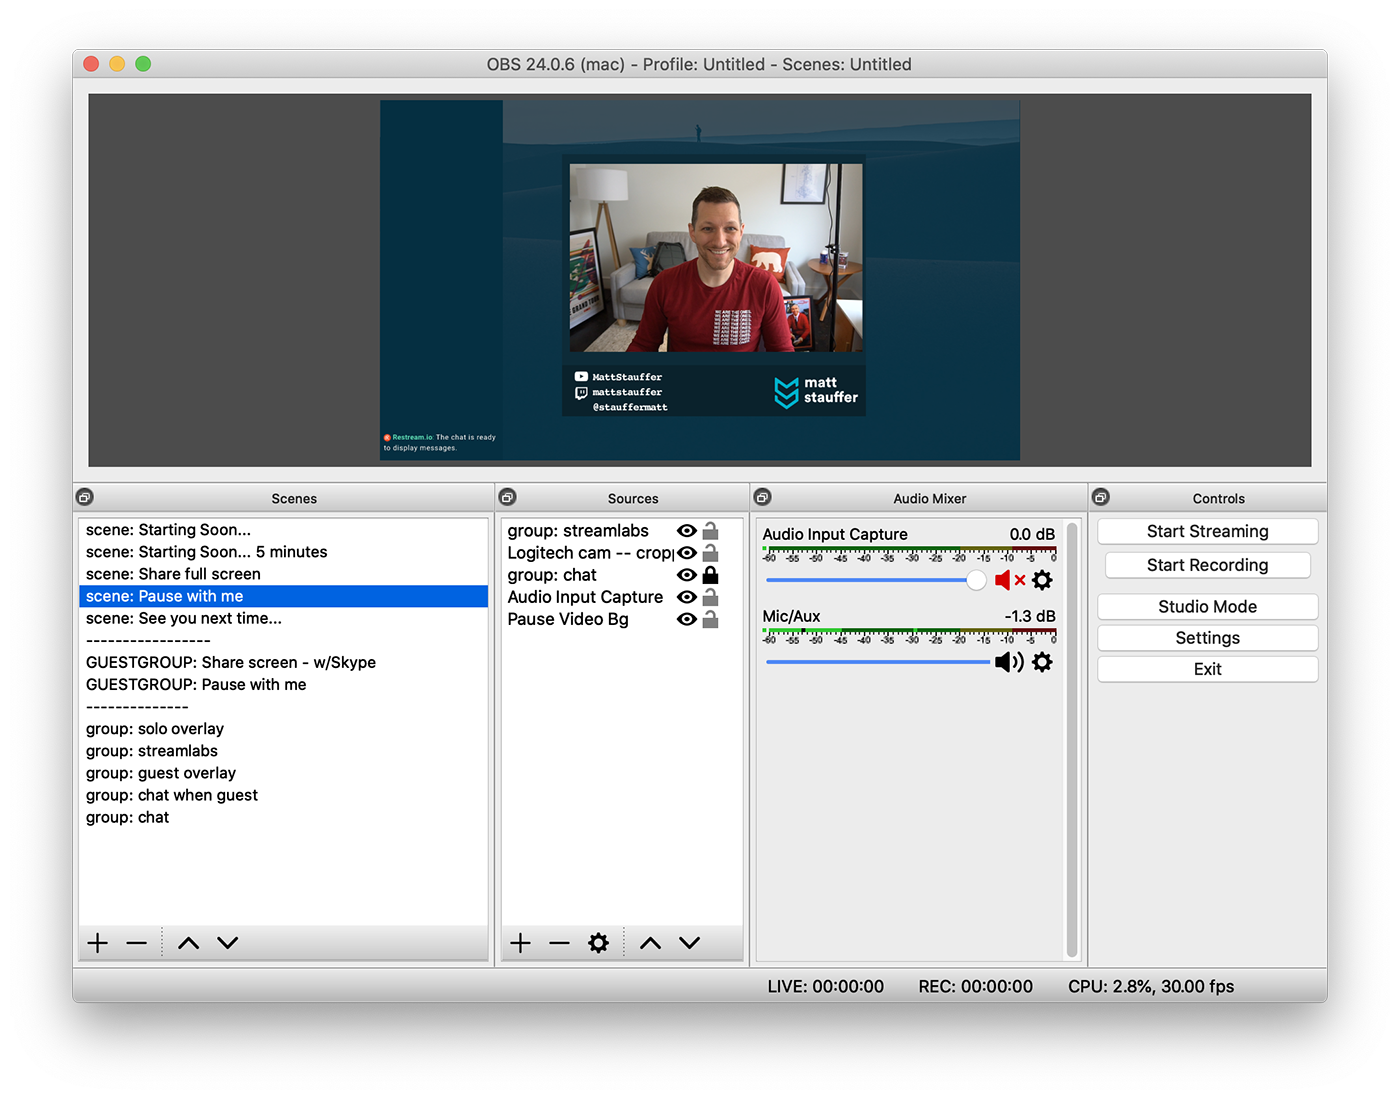
Here are some of my scenes that are true scenes:
And here are my "group" scenes. Remember, I'm using these as pieces to compose the scenes above.
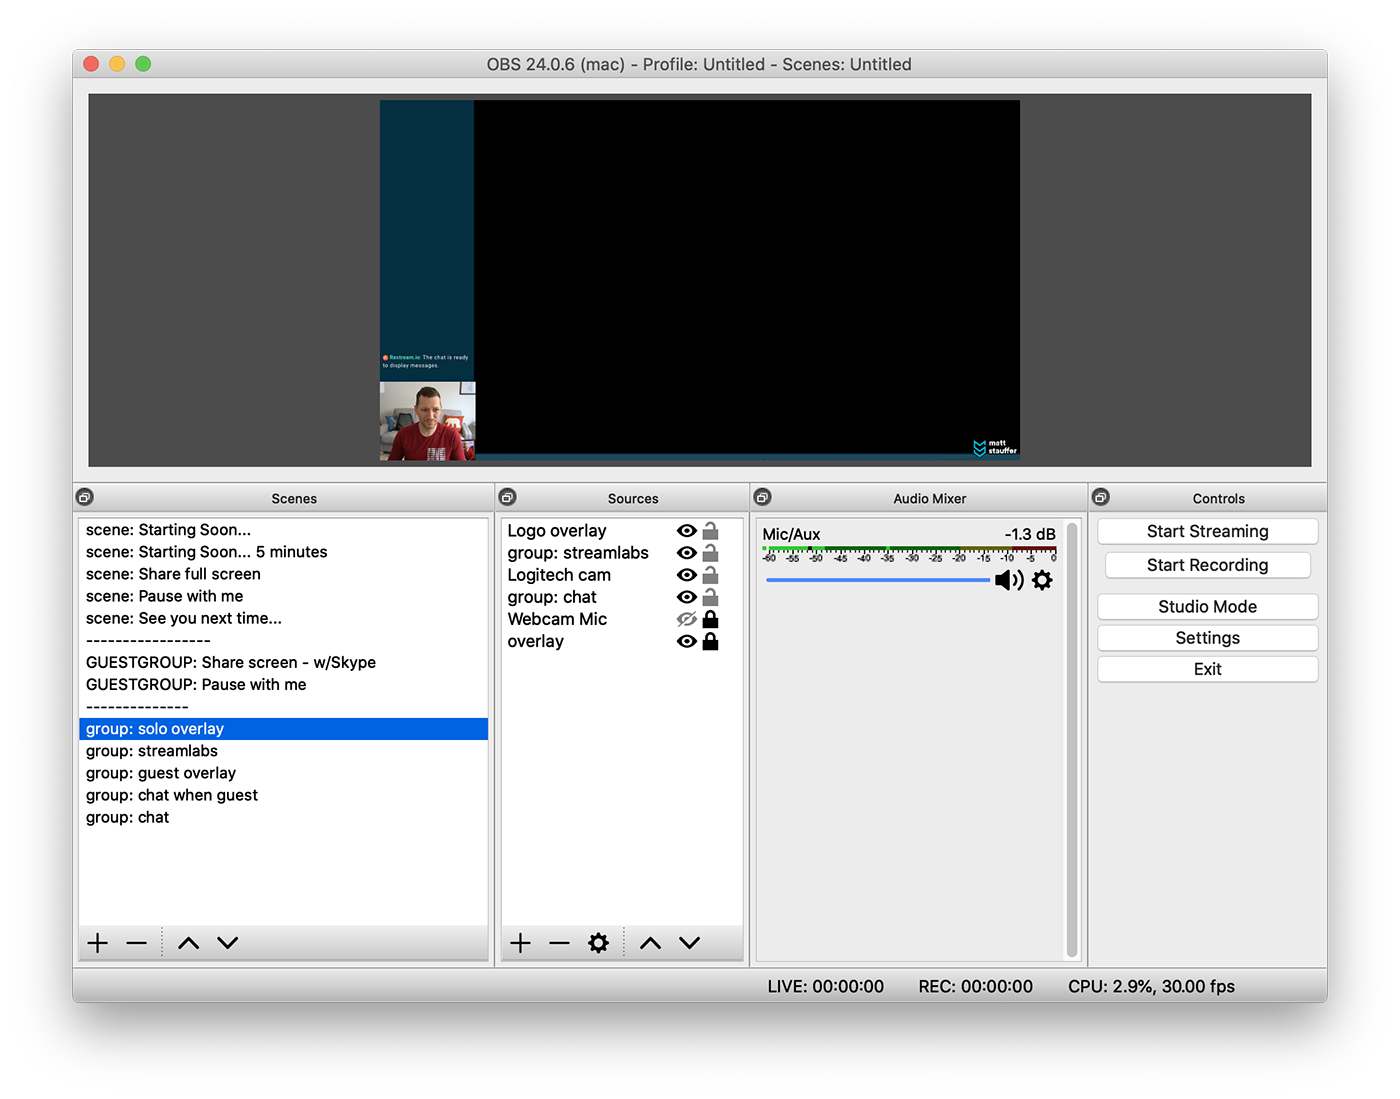
Solo overlay: The solo overlay is the entire set of graphics that goes over and around my screen share. That's the chat, my webcam, my logo graphics, and StreamLabs.

StreamLabs: StreamLabs lets me create a widget in their app that will pop up any time someone subscribes to me (or takes other actions). They then render a transparent web page (which shows the widget when appropriate), and I overlay that web page over part of my screen, so the animations will show there whenever I get a new follower.

Chat: Restream consolidates the chats from all of my streaming services into one chat, and provides a web URL that renders it live. I shove that poor chat stream into a tiny little compressed box.
OBS Settings
I won't claim I have the perfect settings, but I know that getting settings right can be tough at the start. Here are some of the key settings I have—to be honest, I don't remember which of these are the defaults and which I've customized.
If you have trouble with these settings, OBS has an Auto-Configuration Wizard which might also help you out.
Audio
- Sample rate: 44.1 Khz
- Channels: Mono
- Devices: all disabled except Mic/Auxiliary Audio, which is set to my main mic
Output: Streaming
- Encoder: x264
- Enforce streaming service encoder settings: checked
- Rate control: CBR
- Bitrate: 2000 Kbps
- Keyframe interval: 0
- CPU Usage Preset: veryfast
- Profile: main
- Tune: (None)
Video
- Base (Canvas) Resolution: 1920x1080
- Output (Scaled) Resolution: 1920x1080
- Downscale Filter: Bicubic
- Common FPS Values: 30
5. Screen size
You're likely going to want to send a stream to your audience that's smaller than the resolution of your screen (especially if it's Retina). One common way to do this is to change your screen's resolution before you stream, and that's what I did for a long time.
But lately I've instead set OBS to only capture a smaller portion of my screen. This way my audience doesn't see my menu bar or my dock, I can move important windows like the chat onto my primary monitor (but outside of the screen capture window), and I don't have to deal with resizing my screen all the time.
I learned this trick from an Noopkat, a popular streamer, in her article Lessons From One Year of Streaming on Twitch.
Here's what my actual screen looks like, with the red border (added after the screenshot) showing where OBS is actually capturing.
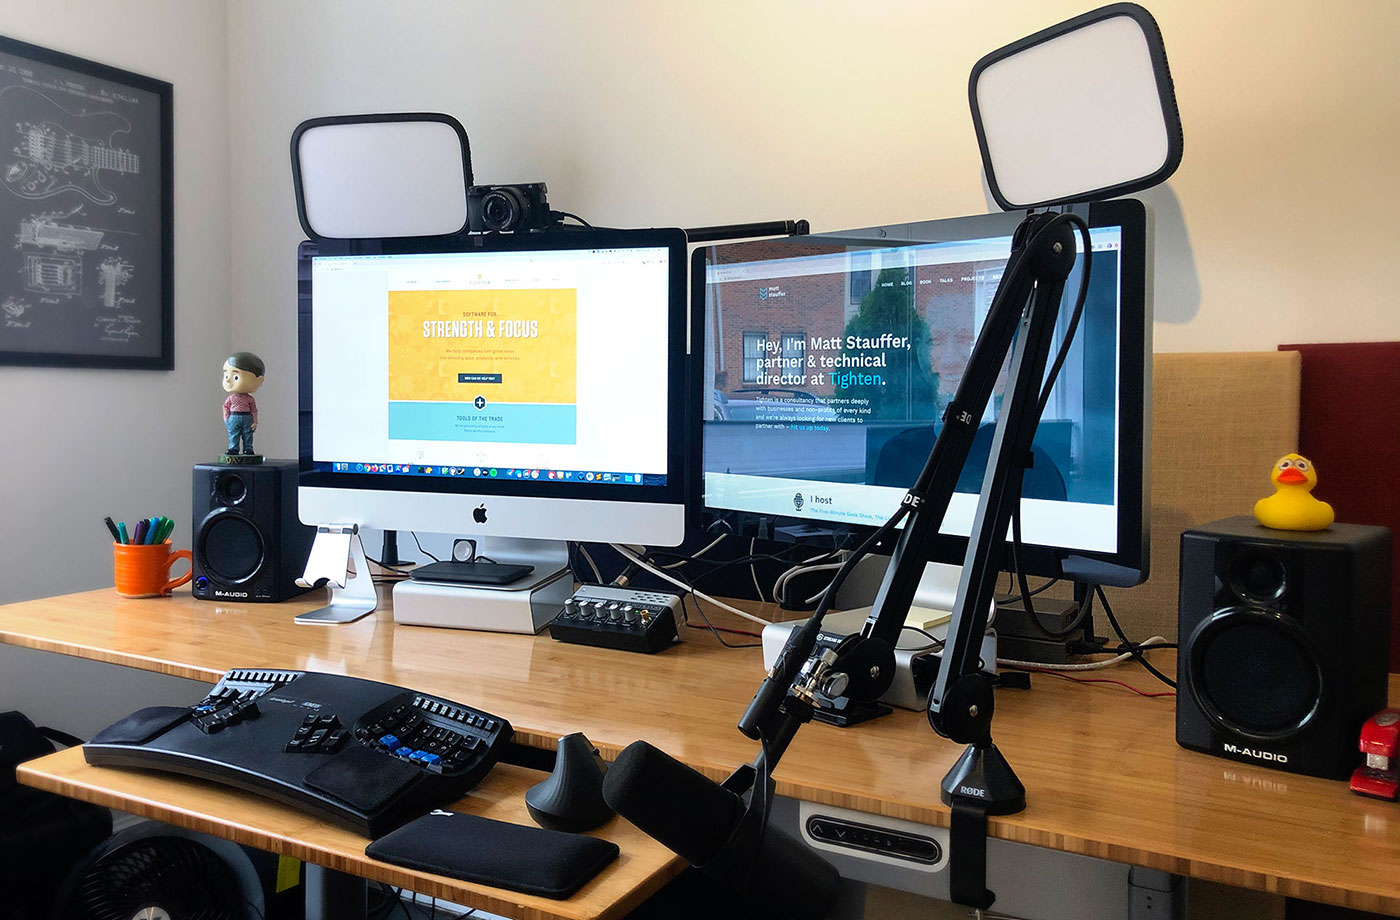
6. Hardware
You can see a longer writeup on my webcam, lights, and mic—and entry-level options for each—in my recent post, Setting up your webcam, lights, and audio for remote work, podcasting, videos, and streaming, but here's a short list of my actual relevant equipment:
- 2017 Retina 27-inch 5k iMac - 4.2Ghz quad-core i7, 8GB RAM, Radeon Pro 580
- Sony A6300 (bought used on eBay)
- Elgato cam link
- Shure SM7b Mic, Triton Fethead & Mackie Onyx Blackjack
- M-Audio Speakers
- Sennheiser HD-280 Pro Headphones
- Elgato Stream Deck
- Kinesis Advantage 2 Keyboard
- Anker Vertical Mouse
- Elgato Key Light
- LIFX Z light and LIFX A19 Color
I mentioned this in the article linked above, but not all of this is necessary! You can absolutely get by with this setup:
- Decent Logitech or Razer Kiyo webcam
- Decent lighting (even just a $20 ring light)
- Cheap mic (any headset you already own, your Airpods, or maybe the Audio Technica ATR2100 USB)
You don't need a fancy keyboard, fancy lights, a DSLR, fancy speakers, a Stream Deck, or anything else to stream. I mean, hell, if you're just getting started, do your first stream with whatever you have laying around. Just stream!
Stream Deck
I love all of this hardware, but there's one that's especially targeted at streamers: the Elgato Stream Deck.
I actually wrote an article all about my Stream Deck setup and released it at the same time as this post, so go check it out if you're interested!
7. Integrations
There are a host of software and online services you can integrate into your stream experience. Here are the categories I'm aware of:
Audio Capture
OBS itself makes it easy to capture various apps and web sites and parts of your screen, but you also might want to capture and process audio before it even hits OBS as a source. My favorite apps for this process are made by Rogue Amoeba, and one of their tools is key for streamers: Loopback.
Loopback (free)
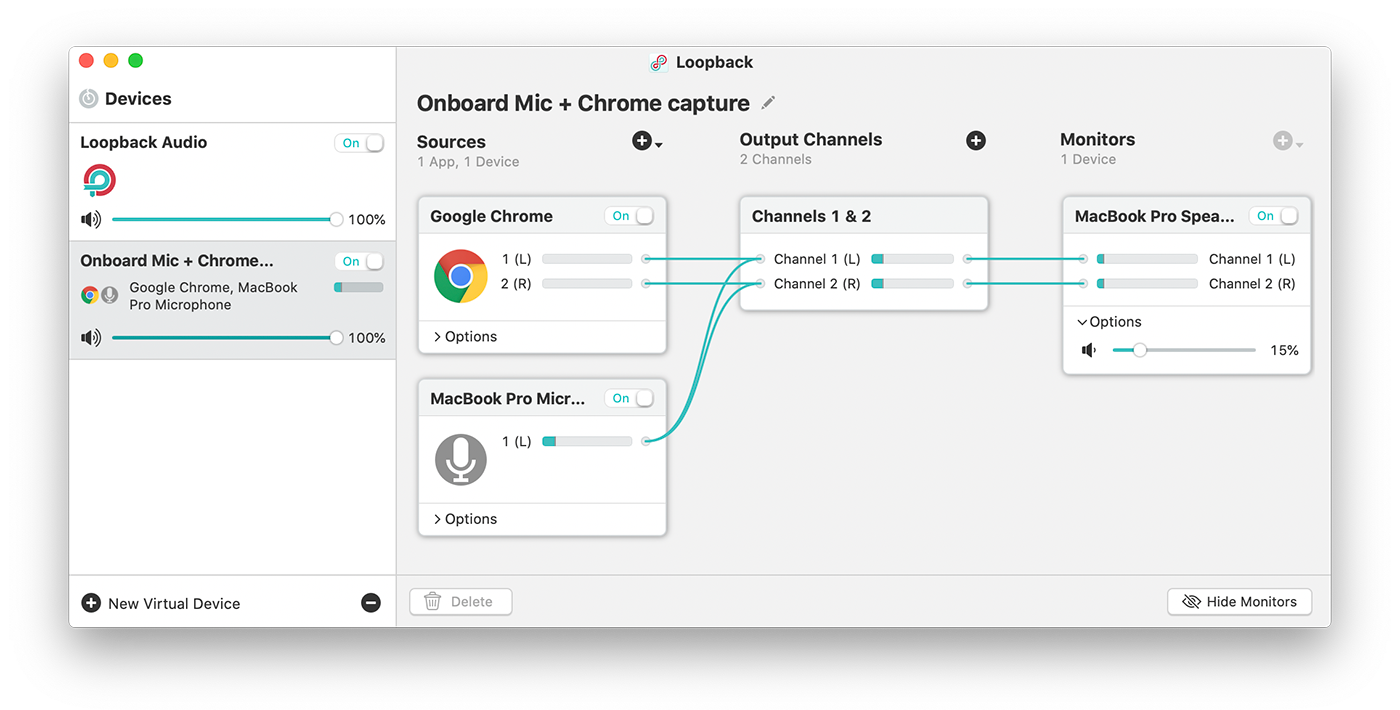
Loopback is an audio routing tool that allows you to create "virtual devices" from other sources that look, to your computer and your apps (including OBS) like actual audio inputs.
You can see the simplest usage of Loopback in the image above: combining multiple audio sources (including one, Chrome, which normally would be hard to capture) and sending them to a single virtual devicee.
Anothr way I've used Loopback is to create a new virtual device called "Split left channel" and then make a new virtual input that maps the left channel of that input to both channels of the virtual device.
Aggregators
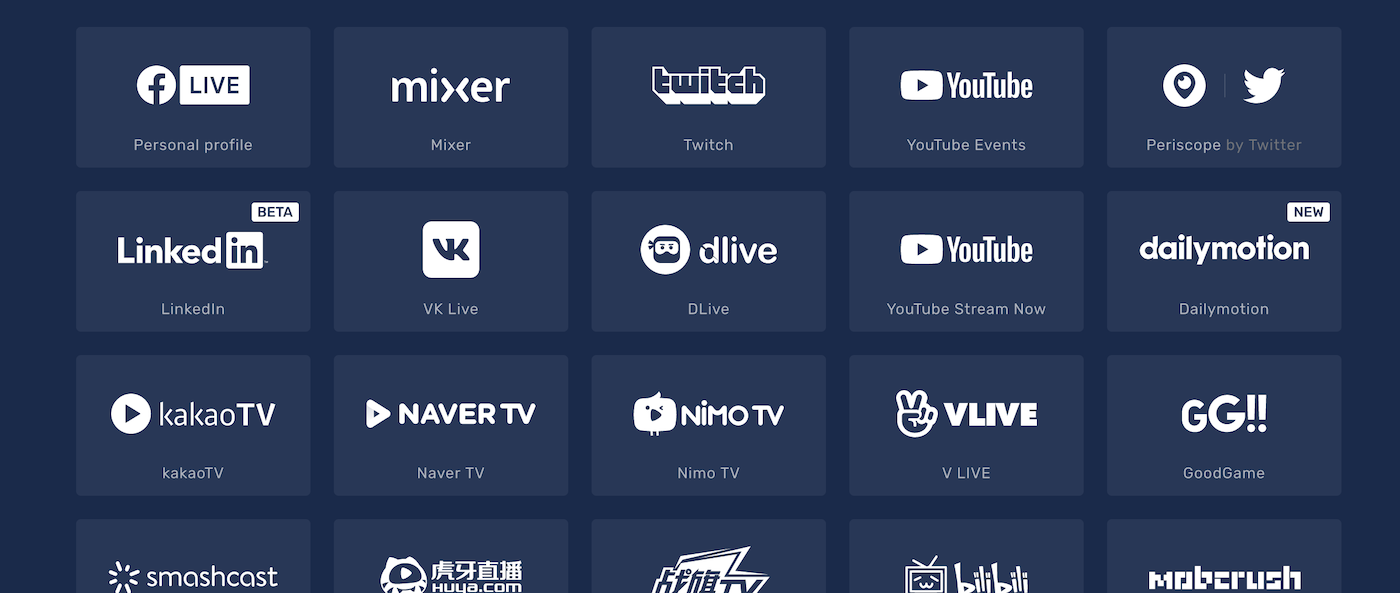
StreamLabs OBS offers limited Multistream: you can stream to Twitch + Facebook or YouTube + Facebook, but not Twitch + YouTube. And, sadly, no other broadcasting apps I know of offer multistream.
That means if you want to stream to more than one service at once, you'll need to use an aggregator. I use and recommend Restream, which can stream to dozens of services at once, and also offers an aggregated chat app so you can interact with all of our communities at once.
Restream's free tier is great, and has been more than enough for me. I found a great getting started with Restream tutorial.
Overlays and Bots
There are a few services that collect together a suite of tools targeting streamers. The main two I know of are StreamLabs (which I use) and StreamElements. You can dig into their sites to learn about the insane number of tools they offer (rolling credits at the end, tip jars, sponsor banners, etc.), but here are the ones I use:
Bots
Just like the chat bots of yore in IRC and Slackbot, you can program your own bot that will hang out in your chats and respond to timers, commands, and outside input to take actions in the chat and elsewhere.
My bot (powered by Streamlabs' Cloudbot) shares a message any time I get a new follower, offers commands like !editor to learn about my theme and text editor, and provides some mod tools, but it could do way more if I had the time and energy to configure it.
Overlays
Overlays are basically widgets that you put on top of your stream in your streaming software. There are two main types of overlays: Persistent and popup.
Persistent overlays will occupy a small section of your screen and often show data like number of followers, most recent chat message, and other data you might want to show that's best provided by a web-based service.

If you want to try this out, check out Streamlabs' tool Stream Labels.
Popup overlays will only show up when an action happens—for example, a little GIF of Shaq wiggling shows up on my screen every time I get a new follower.
The way these overlays work is that you get a URL from your overlay provider (something like streamlabs.com/widgets/3409h104123). You'll create a source in your streaming software that renders the content of that URL, and size and position it wherever you want the overlay to show up.
Popup overlays are the most interesting, because you're really just placing a transparent box on your screen. The web page you're rendering (from the overlay provider) stays transparent until a popup needs to be rendered, so you never even know it's there until an alert pops up.

If you want to try this out, check out Streamlabs' Alert Boxes and their other widgets.
8. Editing and releasing after the stream
If you're streaming to Twitch, your videos will be available for replay for a time; the exact time differs depending on whether or not you're a Twitch partner. You can also export your videos to YouTube after streaming to Twitch (although you'll have to wait 24 hours after streaming if you're a Twitch partner).
If you're streaming to YouTube, it'll automatically save every video you stream to your account. Here's my process every time I finish streaming:
- Open up YouTube Studio, edit the video I just completed, and mark it as private.
- Add my tags, title, and description, and add the video to any playlists I'd like
- After a while (I'll have to refresh to check) a link on the left bar will show up titled "Editor". I open this up and trim out the intro countdown from my video so it starts right when I join. I hit save, then set a timer for a few hours and go do other stuff.
- A few hours later, I'll come back, add any end screens or other special YouTube decorations, then I can set the video as public, and I'm done!
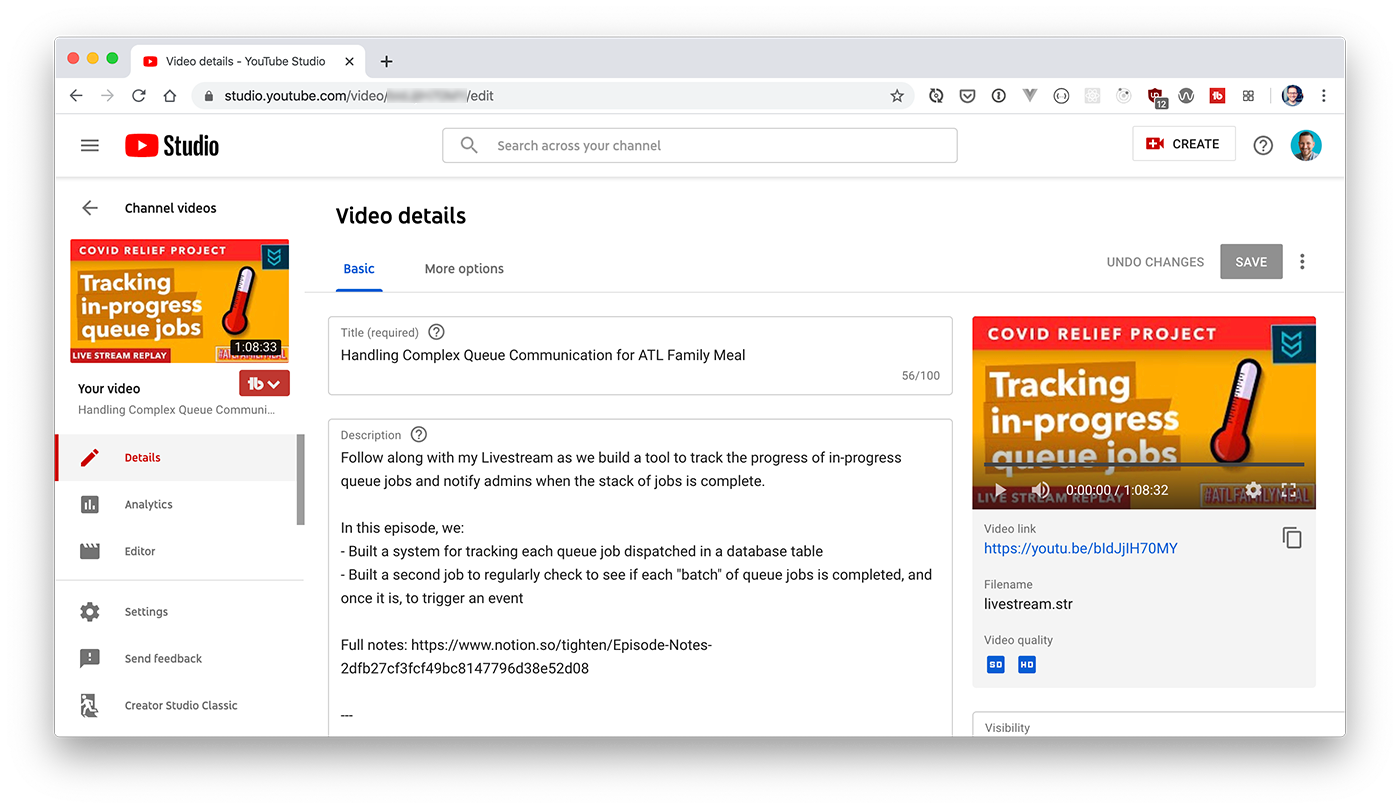
I also create a custom thumbnail for every video in Photoshop.
9. Tips and Tricks
I may add to this section over time, but here are a few tips I can think of off the top of my head.
Consistency and Announcements
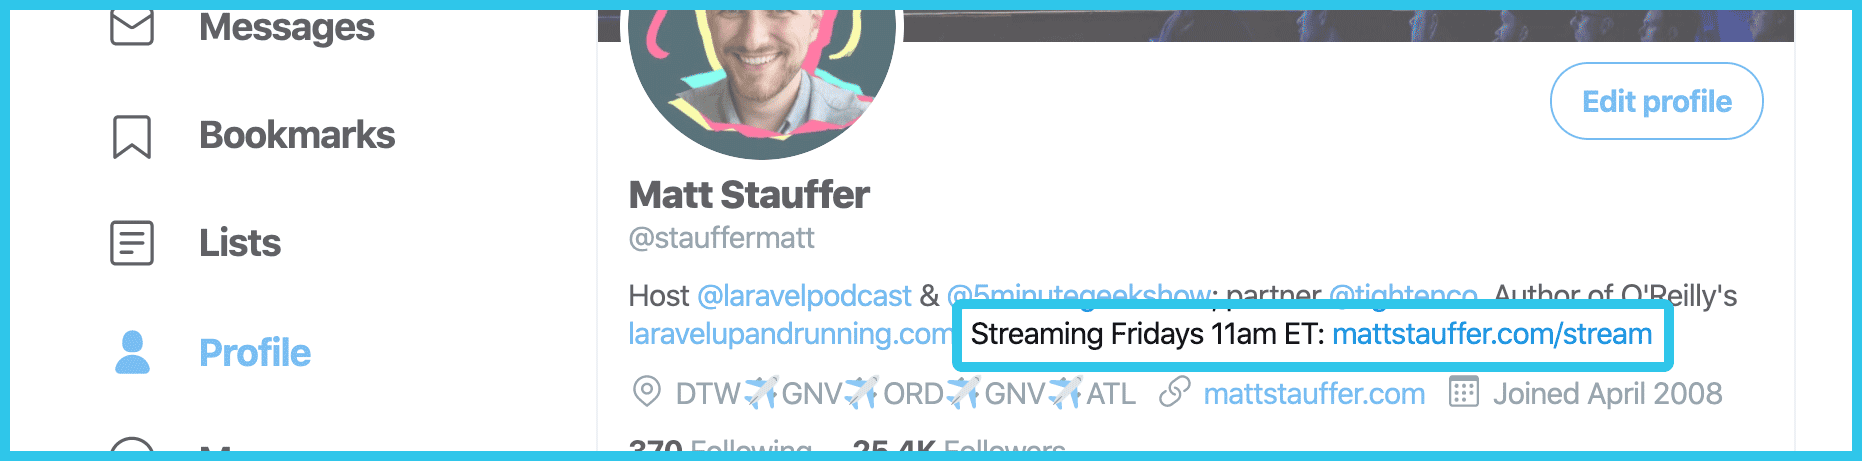
I cannot recommend more highly the practice of picking a time that you're going to stream and sticking to it. That doesn't mean you can't occasionally change it, or even stream at other times, but one of the best ways to get a consistent audience is to let them know when to look forward to your stream.
One thing that helps is to let everyone know in a lot of places and a lot of times that this is the case. I've added my time (11am Eastern on Fridays) to my web site, my Twitter bio, and probably other places, and I'll tweet a reminder the night before and an hour before most weeks too.
Planning and buffer
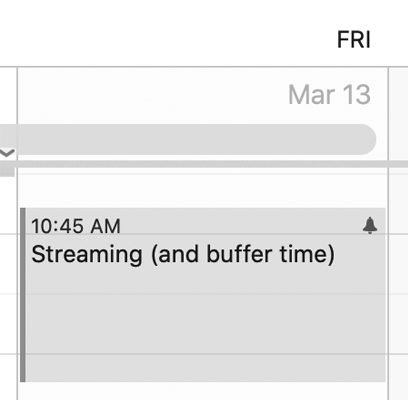
I used to show up to each stream entirely unsure of what I was going to work on. I've since discovered that my better streams happen when I've thought ahead about what I'm going to work on. I can structure what I think an hour of content will look like, I can do any boring prep work needed, and I can tweet the topic out when I'm reminding folks the day before.
It's also important to give 10-15 minutes buffer before and after each stream on your calendar. Don't pack it in tight; you'll regret it.
Chat
Decide whether or not you're going to be a chatter.
I could spend so much more time coding if I didn't pay attention to the chat on my streams.
But I'd also have way less of an enjoyable connection with the folks who take time out of their day to hang out on a stream with me. I love especially when I get to know the regulars over time. And you might be surprised at how much help I get from the folks on the chat. They're full of wisdom and incredible resources, and really contribute to every project I work on.
After that, it's up to you! Nerd out! And if you have any questions or suggestions, hit me up: I'm @mattstauffer on Twitter!
Related posts


Comments? I'm @mattstauffer on Twitter
Tags: live streaming • twitch • youtube • streaming